• Letter Me!
  • Brushes
  • Engraving
  • Activations
  • Workshops
  • Calligraphy Workshops
  • Cricut Workshops
  • Blog
  • Instagram
  • Shop
  • About
  • Contact Us
Letter Me!

Hand lettered with love

  • Letter Me!
  • Brushes
  • Engraving
  • Activations
  • Workshops
  • Calligraphy Workshops
  • Cricut Workshops
  • Blog
  • Instagram
  • Shop
  • About
  • Contact Us

Cricut Infusible Ink - First Impressions!

(… Get the pun?! ;p)

Please note that this post contains affiliate links and I may be compensated by the vendor (at NO ADDITIONAL COST to you) if you make a purchase after clicking on my links. I have provided you with links to Amazon, Amazon Australia, eBay and Cricut.com.

Although Infusible Ink was launched in the US four months ago, I am super excited and so proud to be one of the first to try Infusible Ink in Australia, ahead of the Australian launch next week. 

3AE8955A-192F-431D-846F-37E74FE70235.JPG
48E42851-F77A-4E71-9592-03DF9ADCF42A.JPG

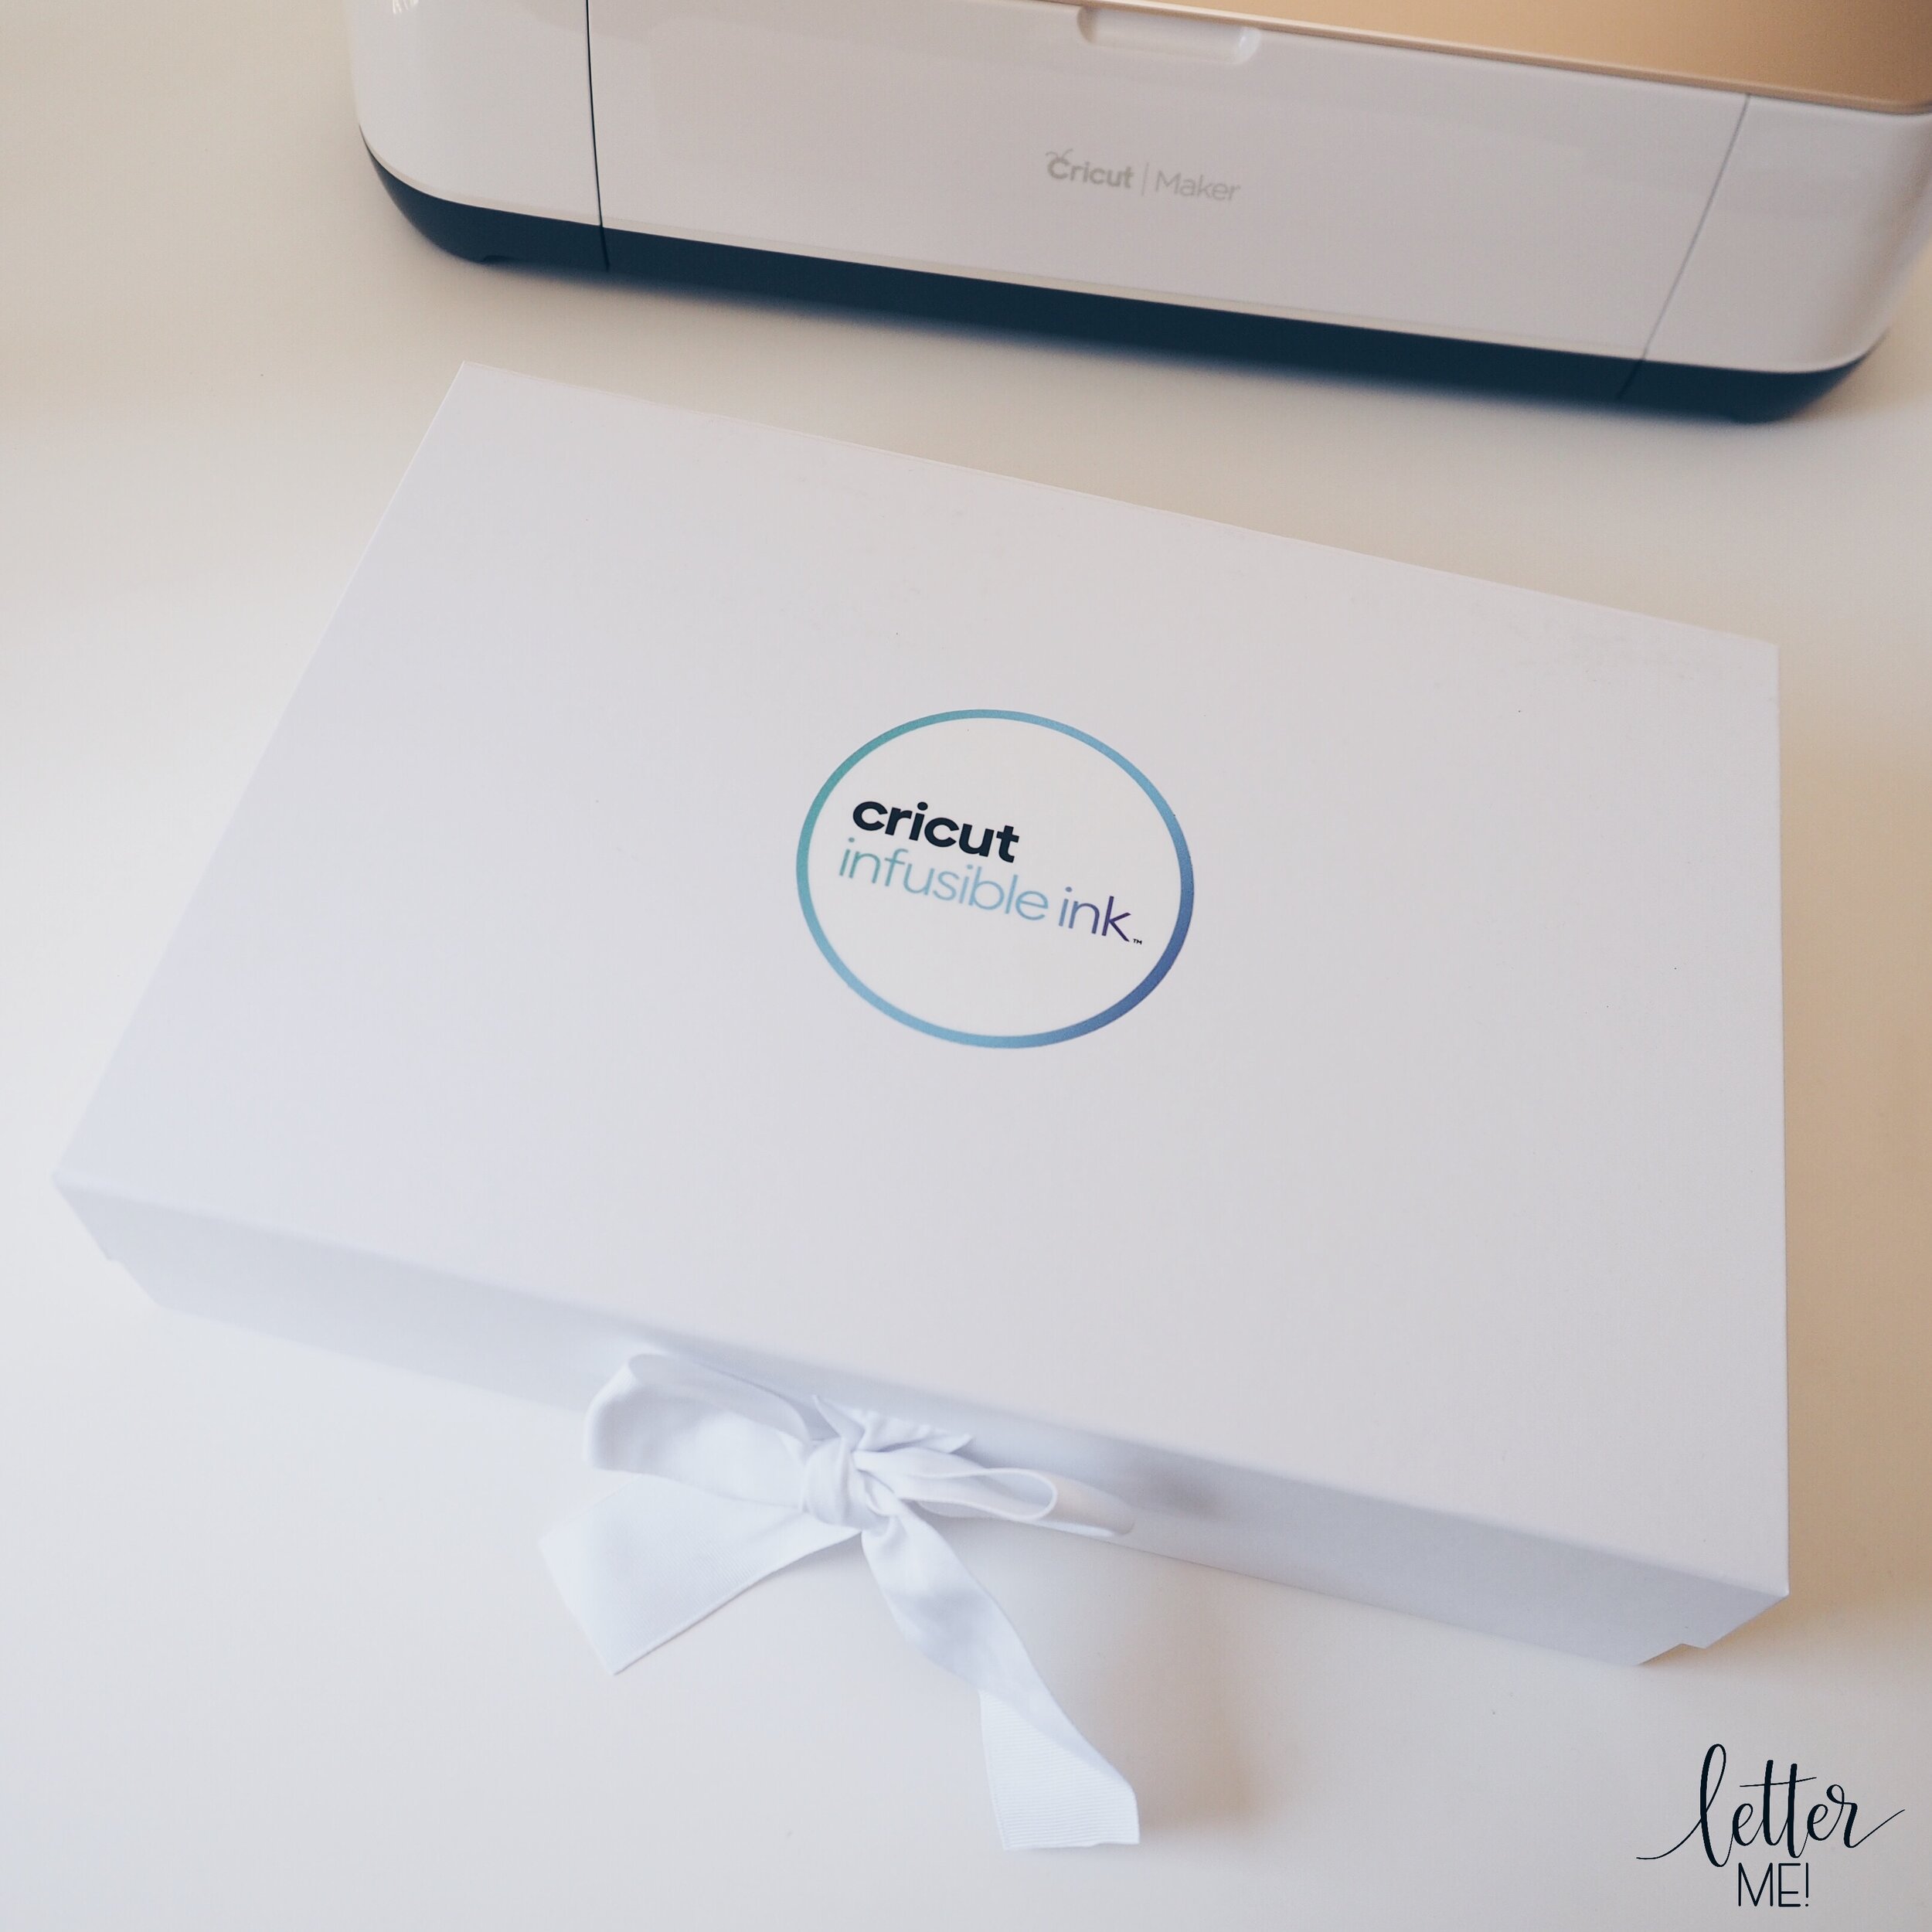
Infusible Ink is the long-awaited heat transfer system by Cricut, allowing you to achieve professional level heat transfers that are durable and can withstand stretching, washing and regular day to day wear. Instead of applying regular Cricut Iron-On (which is a heat transfer vinyl (HTV) that sits on top of your material), as the name suggests, Infusible Ink is ink that gets infused into the fibres of your material.

As I am still very new to this system, I wanted to share my initial process and thoughts with you as I go along this journey. I know many of you have been waiting for my review, so before I delve deeper and experiment more with what Infusible Ink has to offer, here is my first project to share with you.

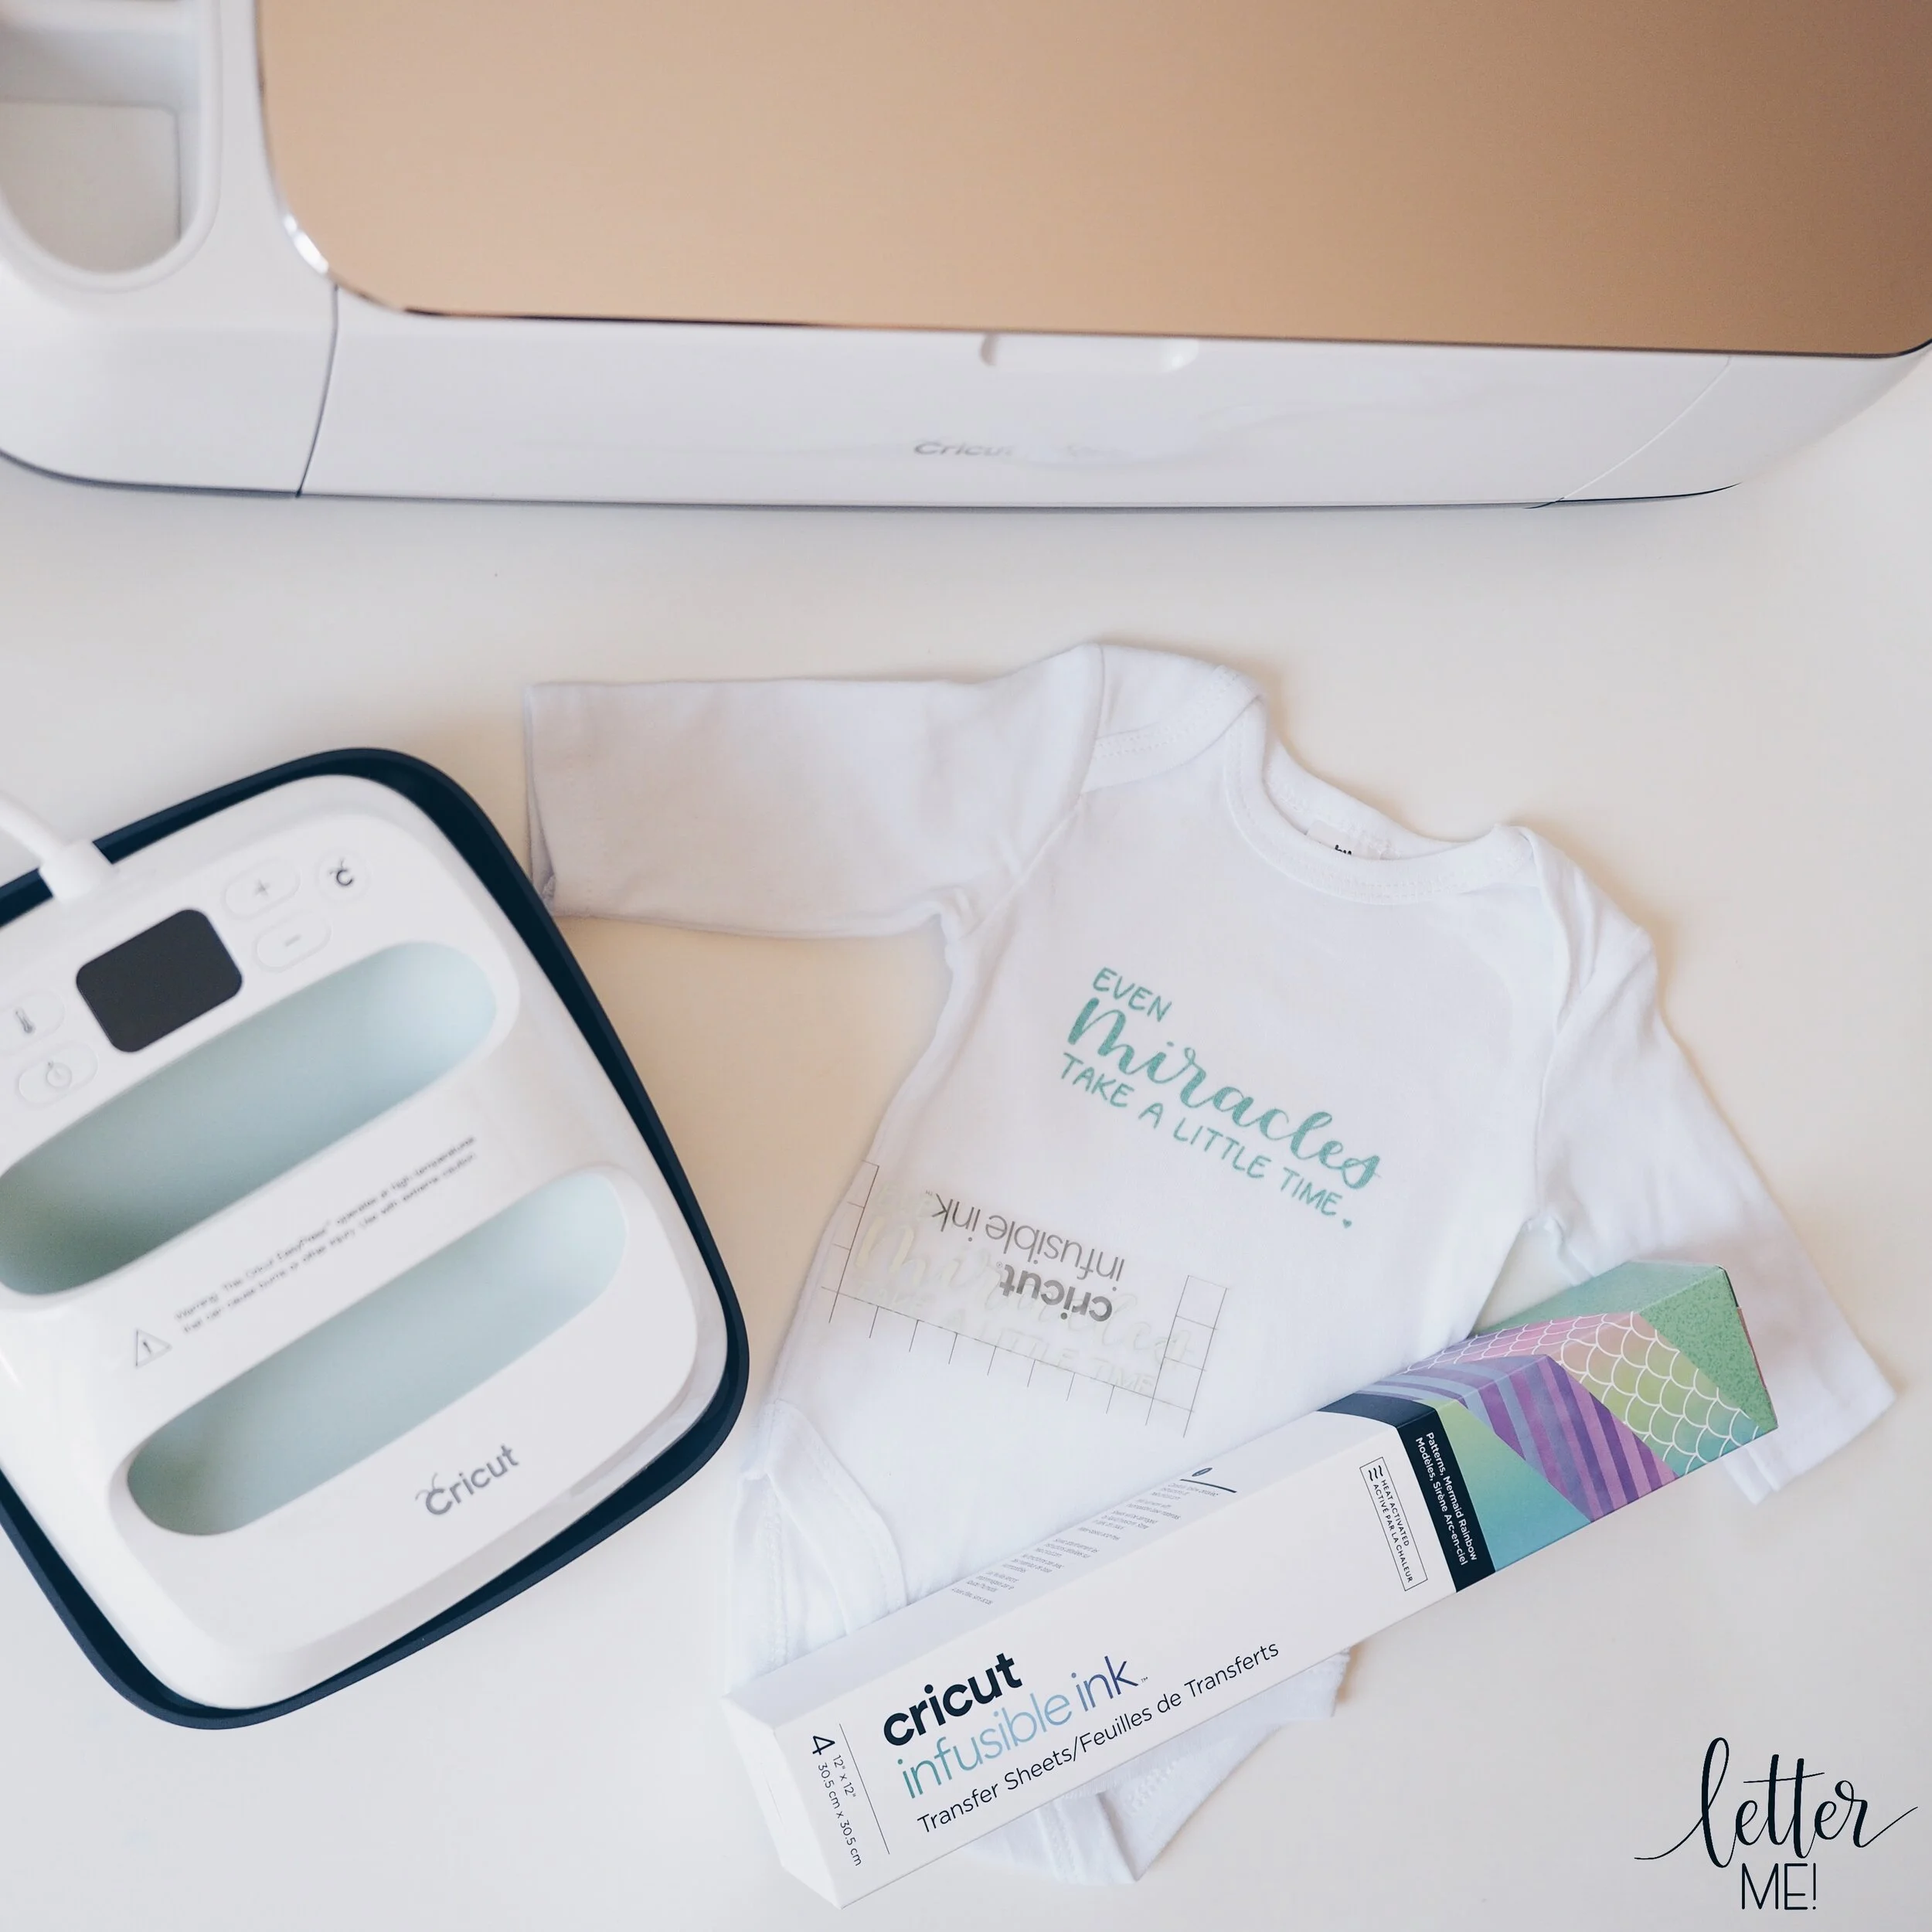
“Even miracles take a little time“ Baby Onesie using Cricut Infusible Ink technology

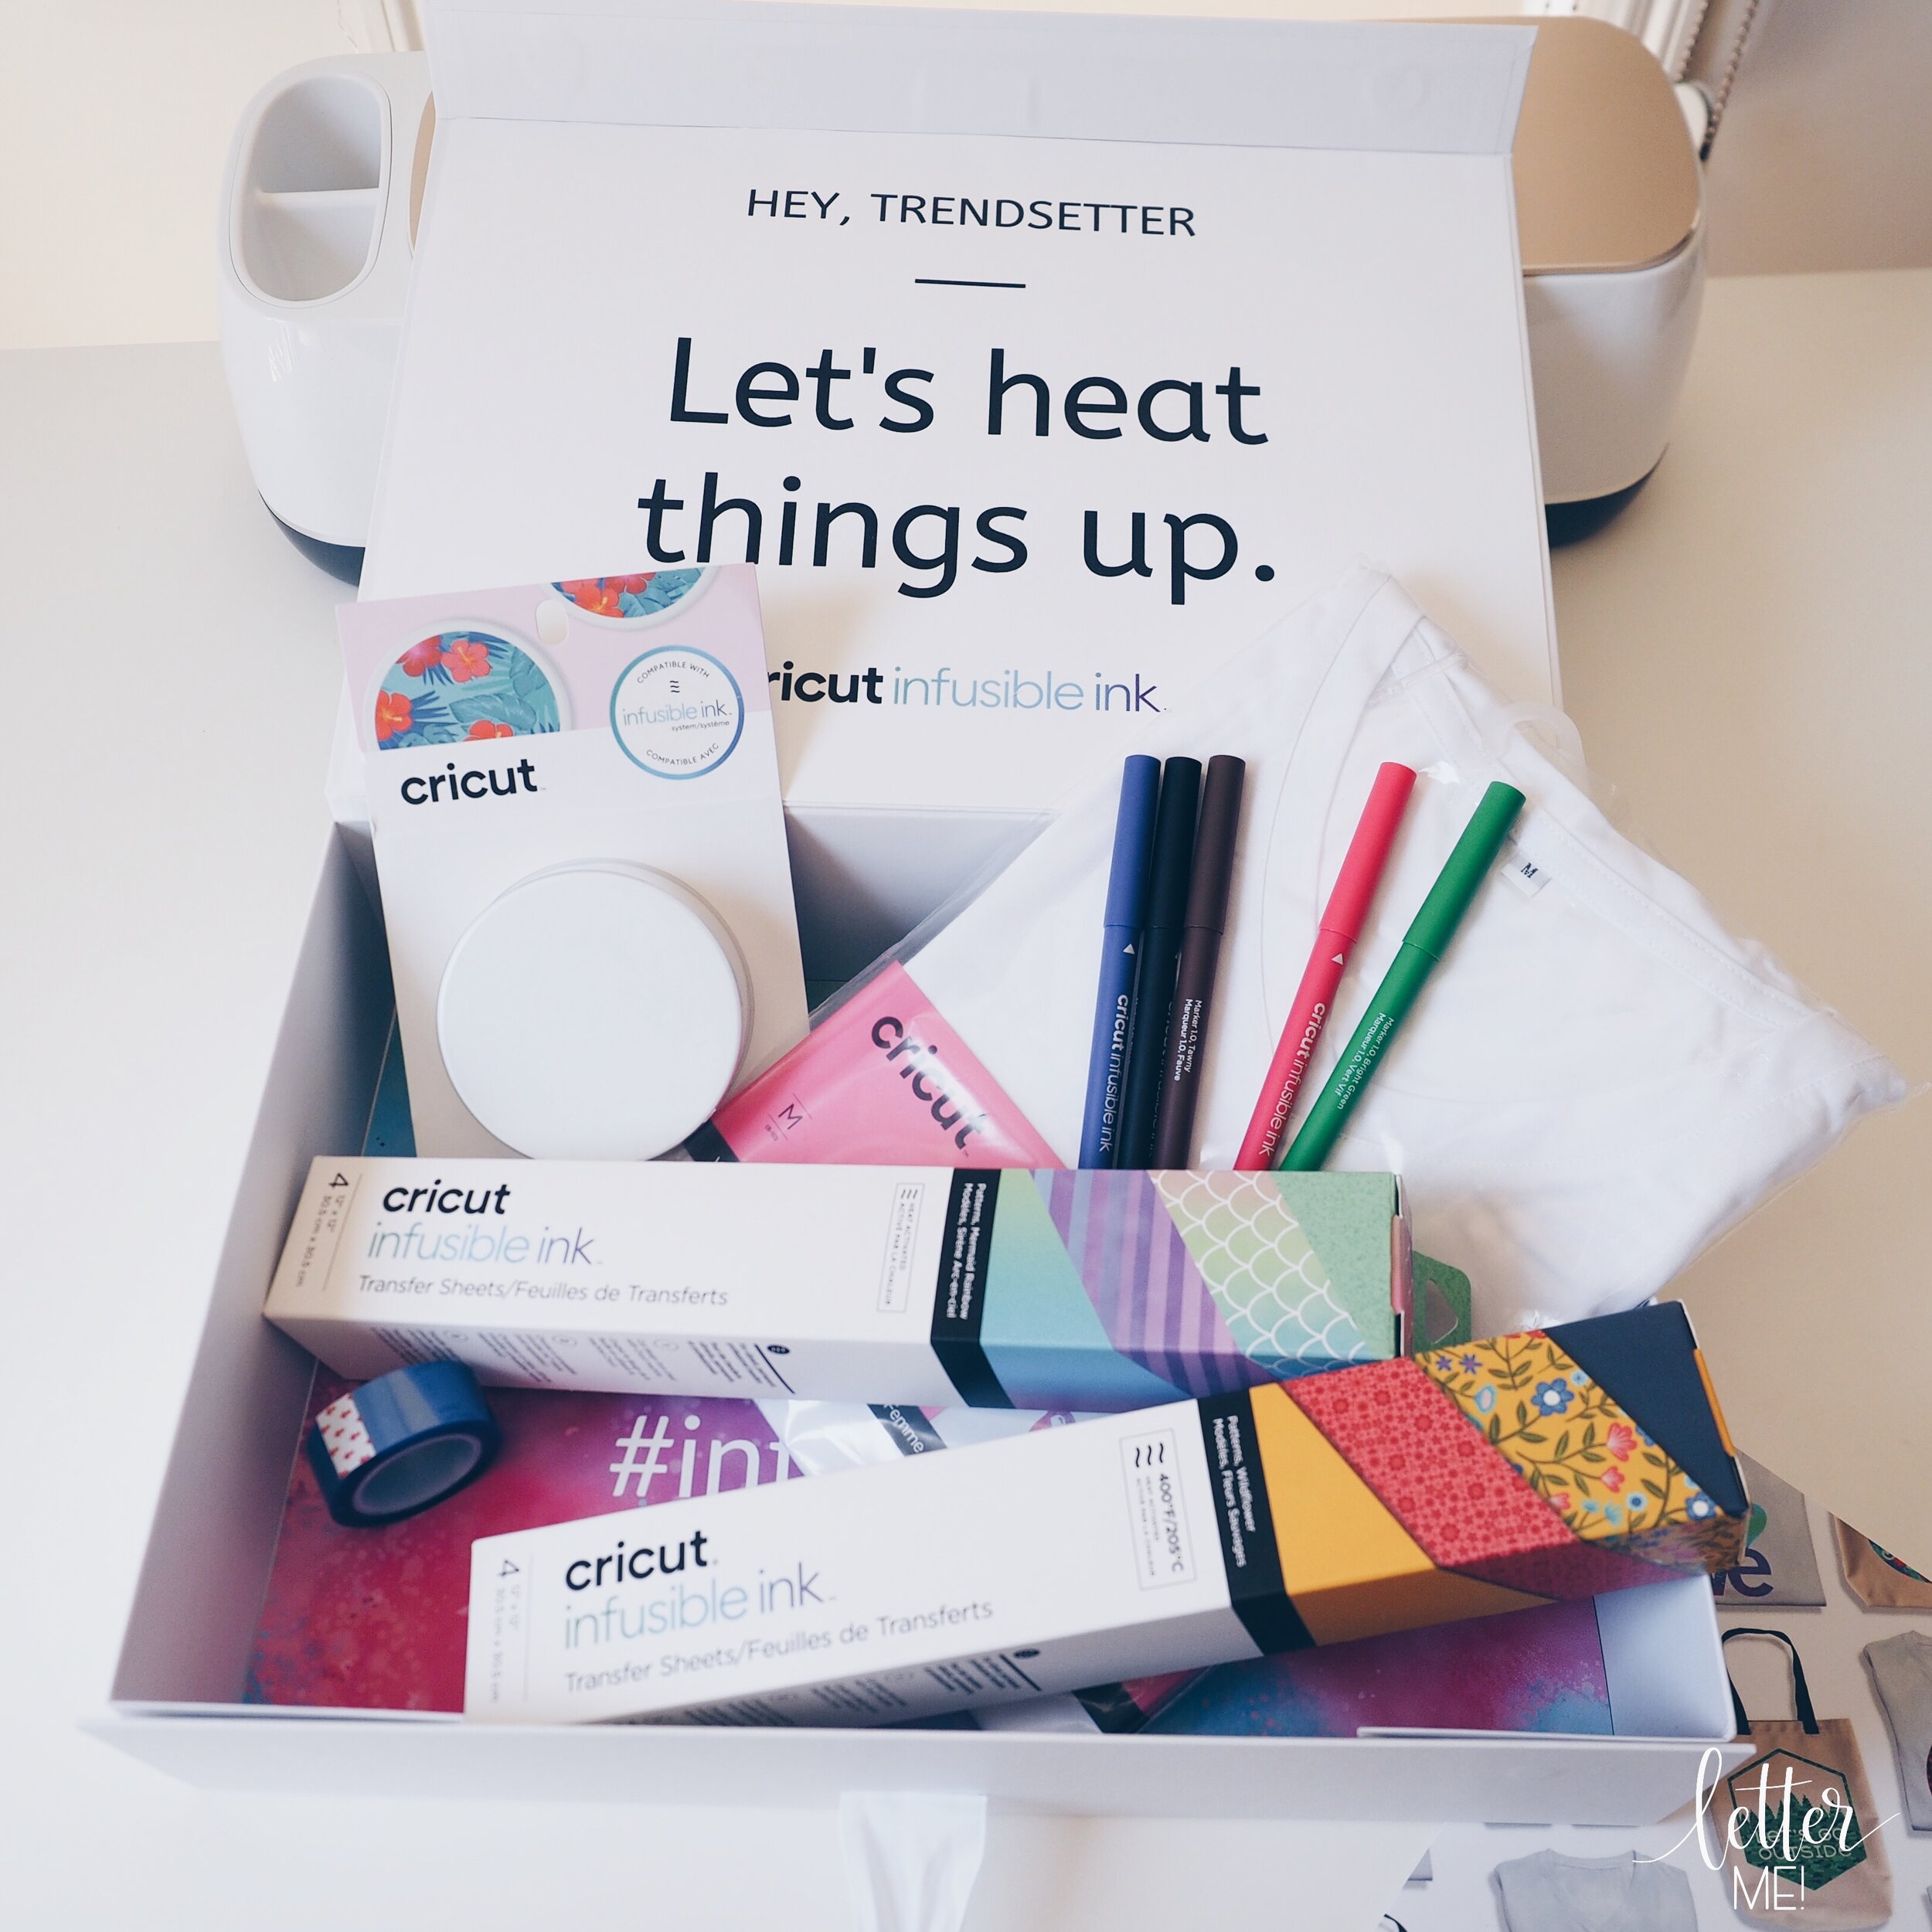
Here’s what I used (links to retailers below each item):

DA589D0E-604D-45AA-8654-FA6942BD9DCB.JPG
  • Apple iPad Pro and Apple Pencil, with Procreate App (Amazon, Amazon Australia, eBay)

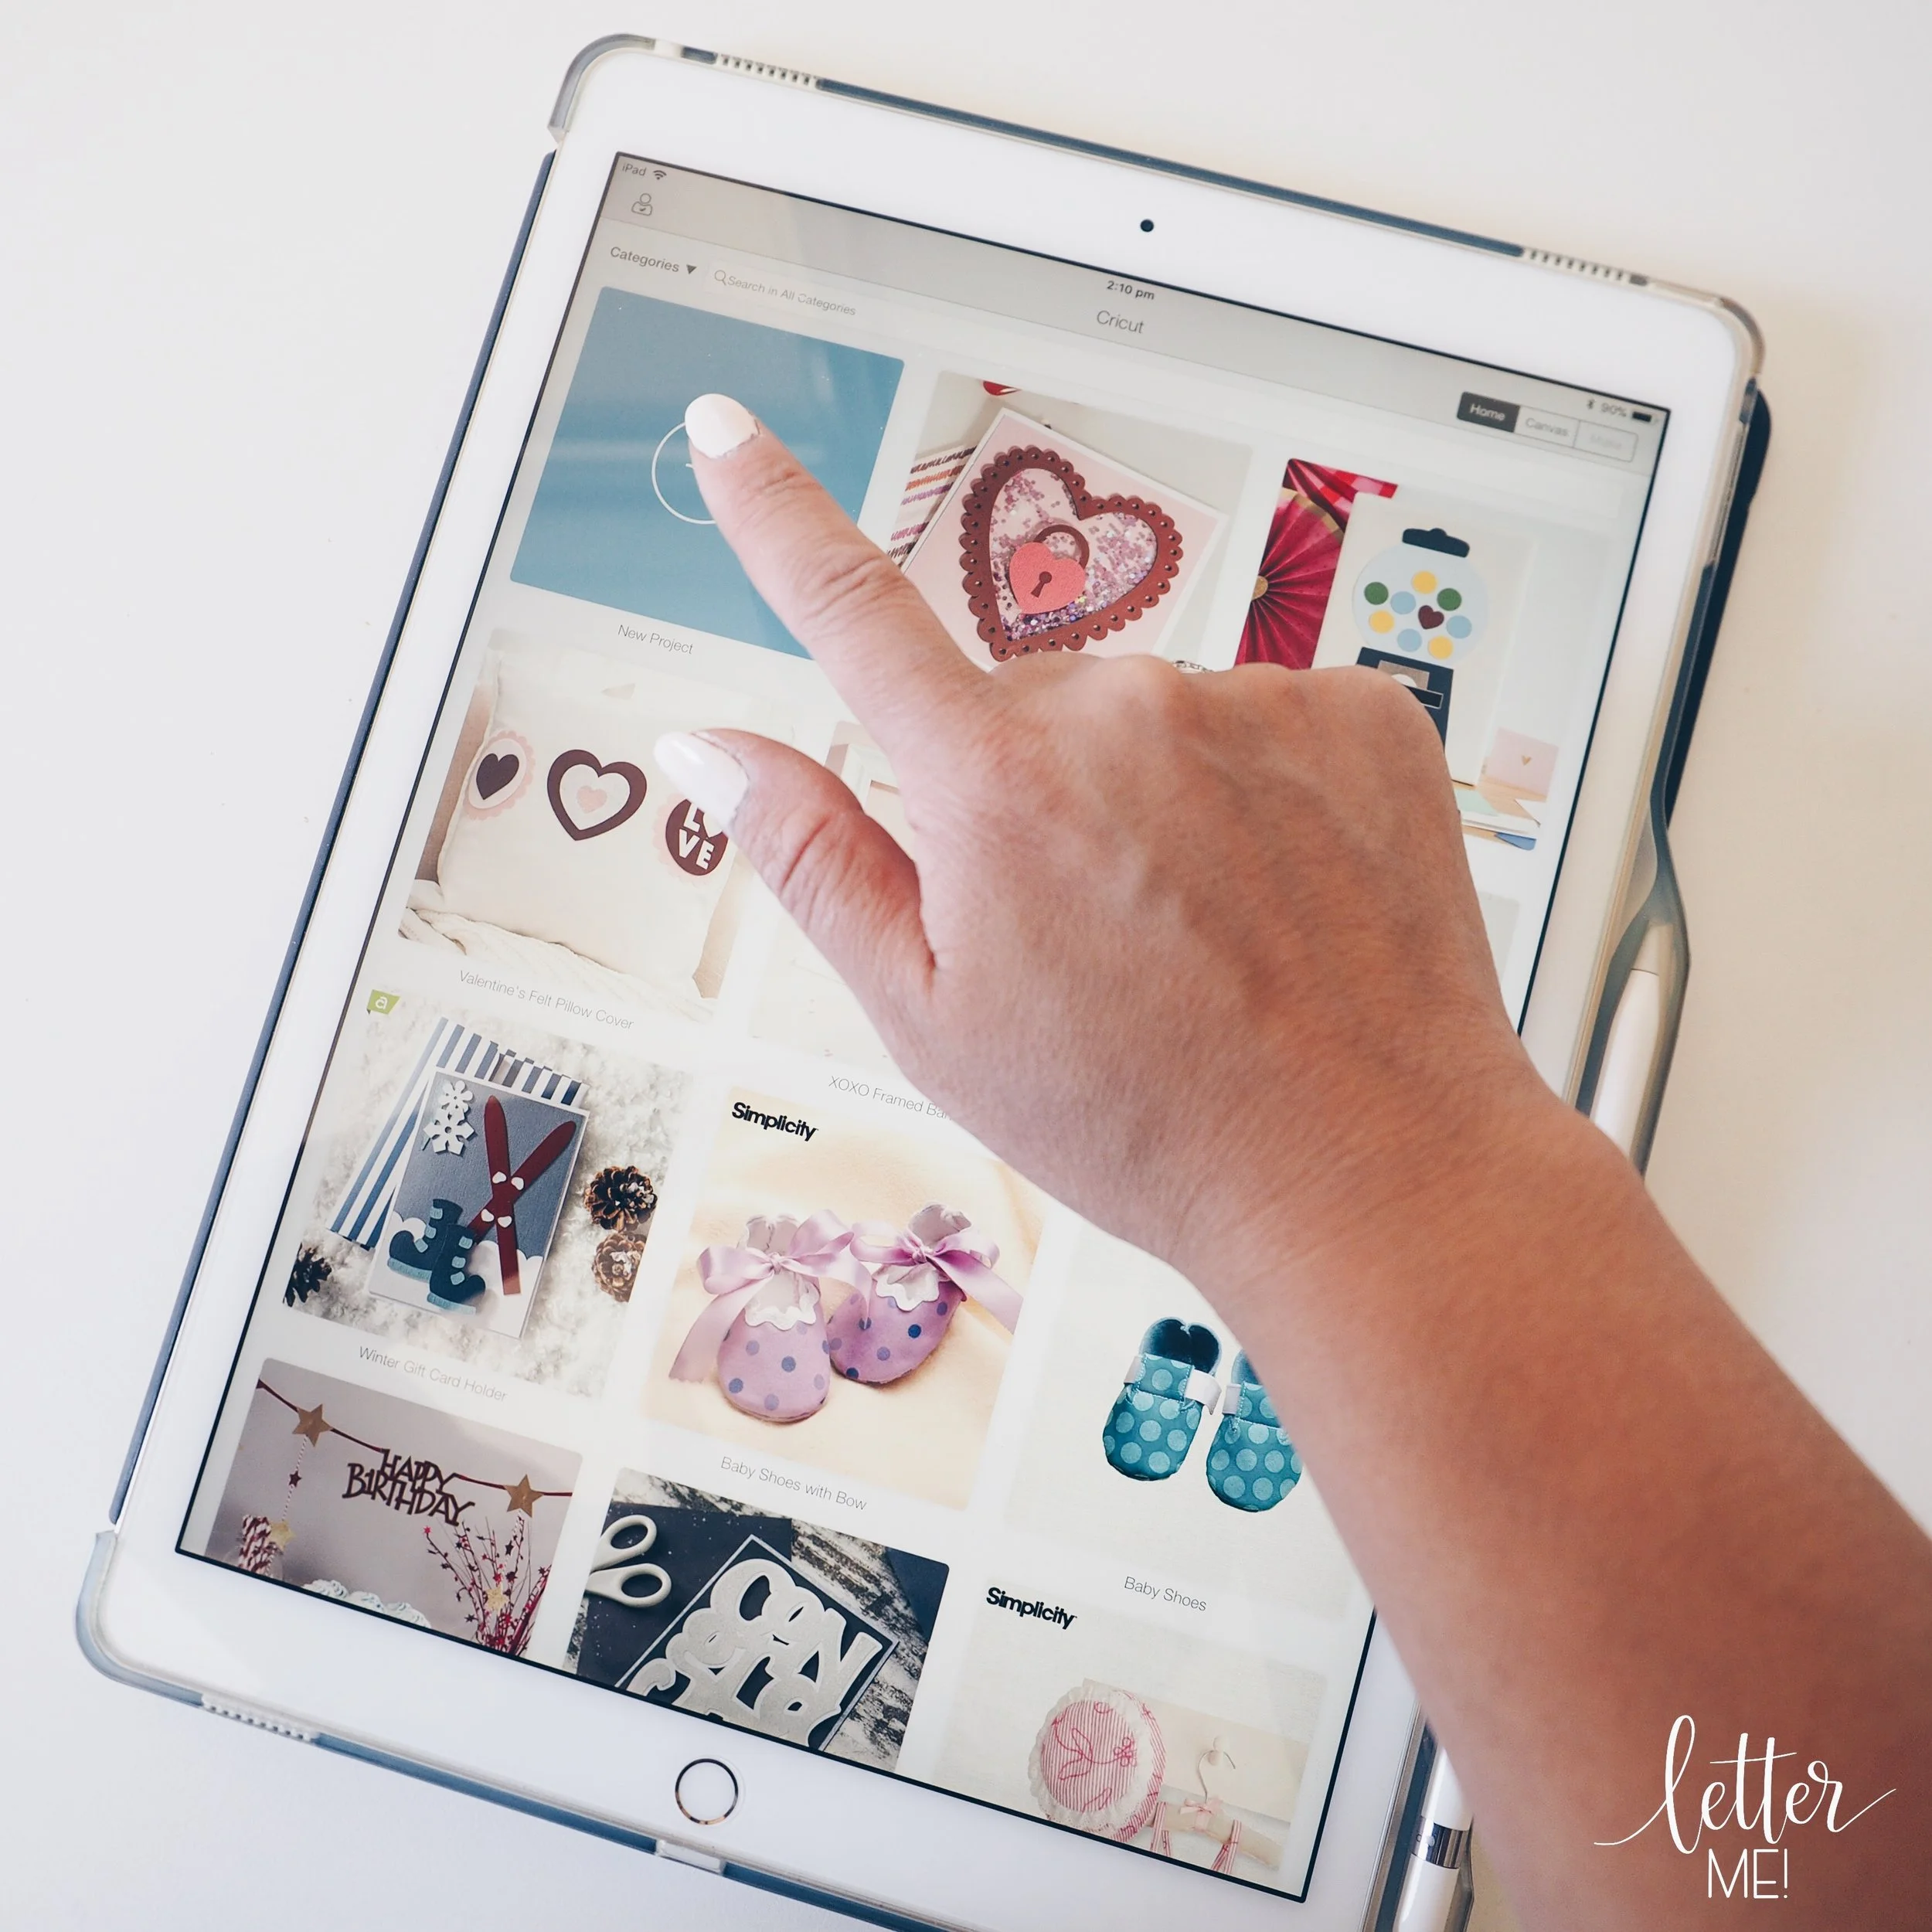
  • Cricut Design Space software (https://design.cricut.com)

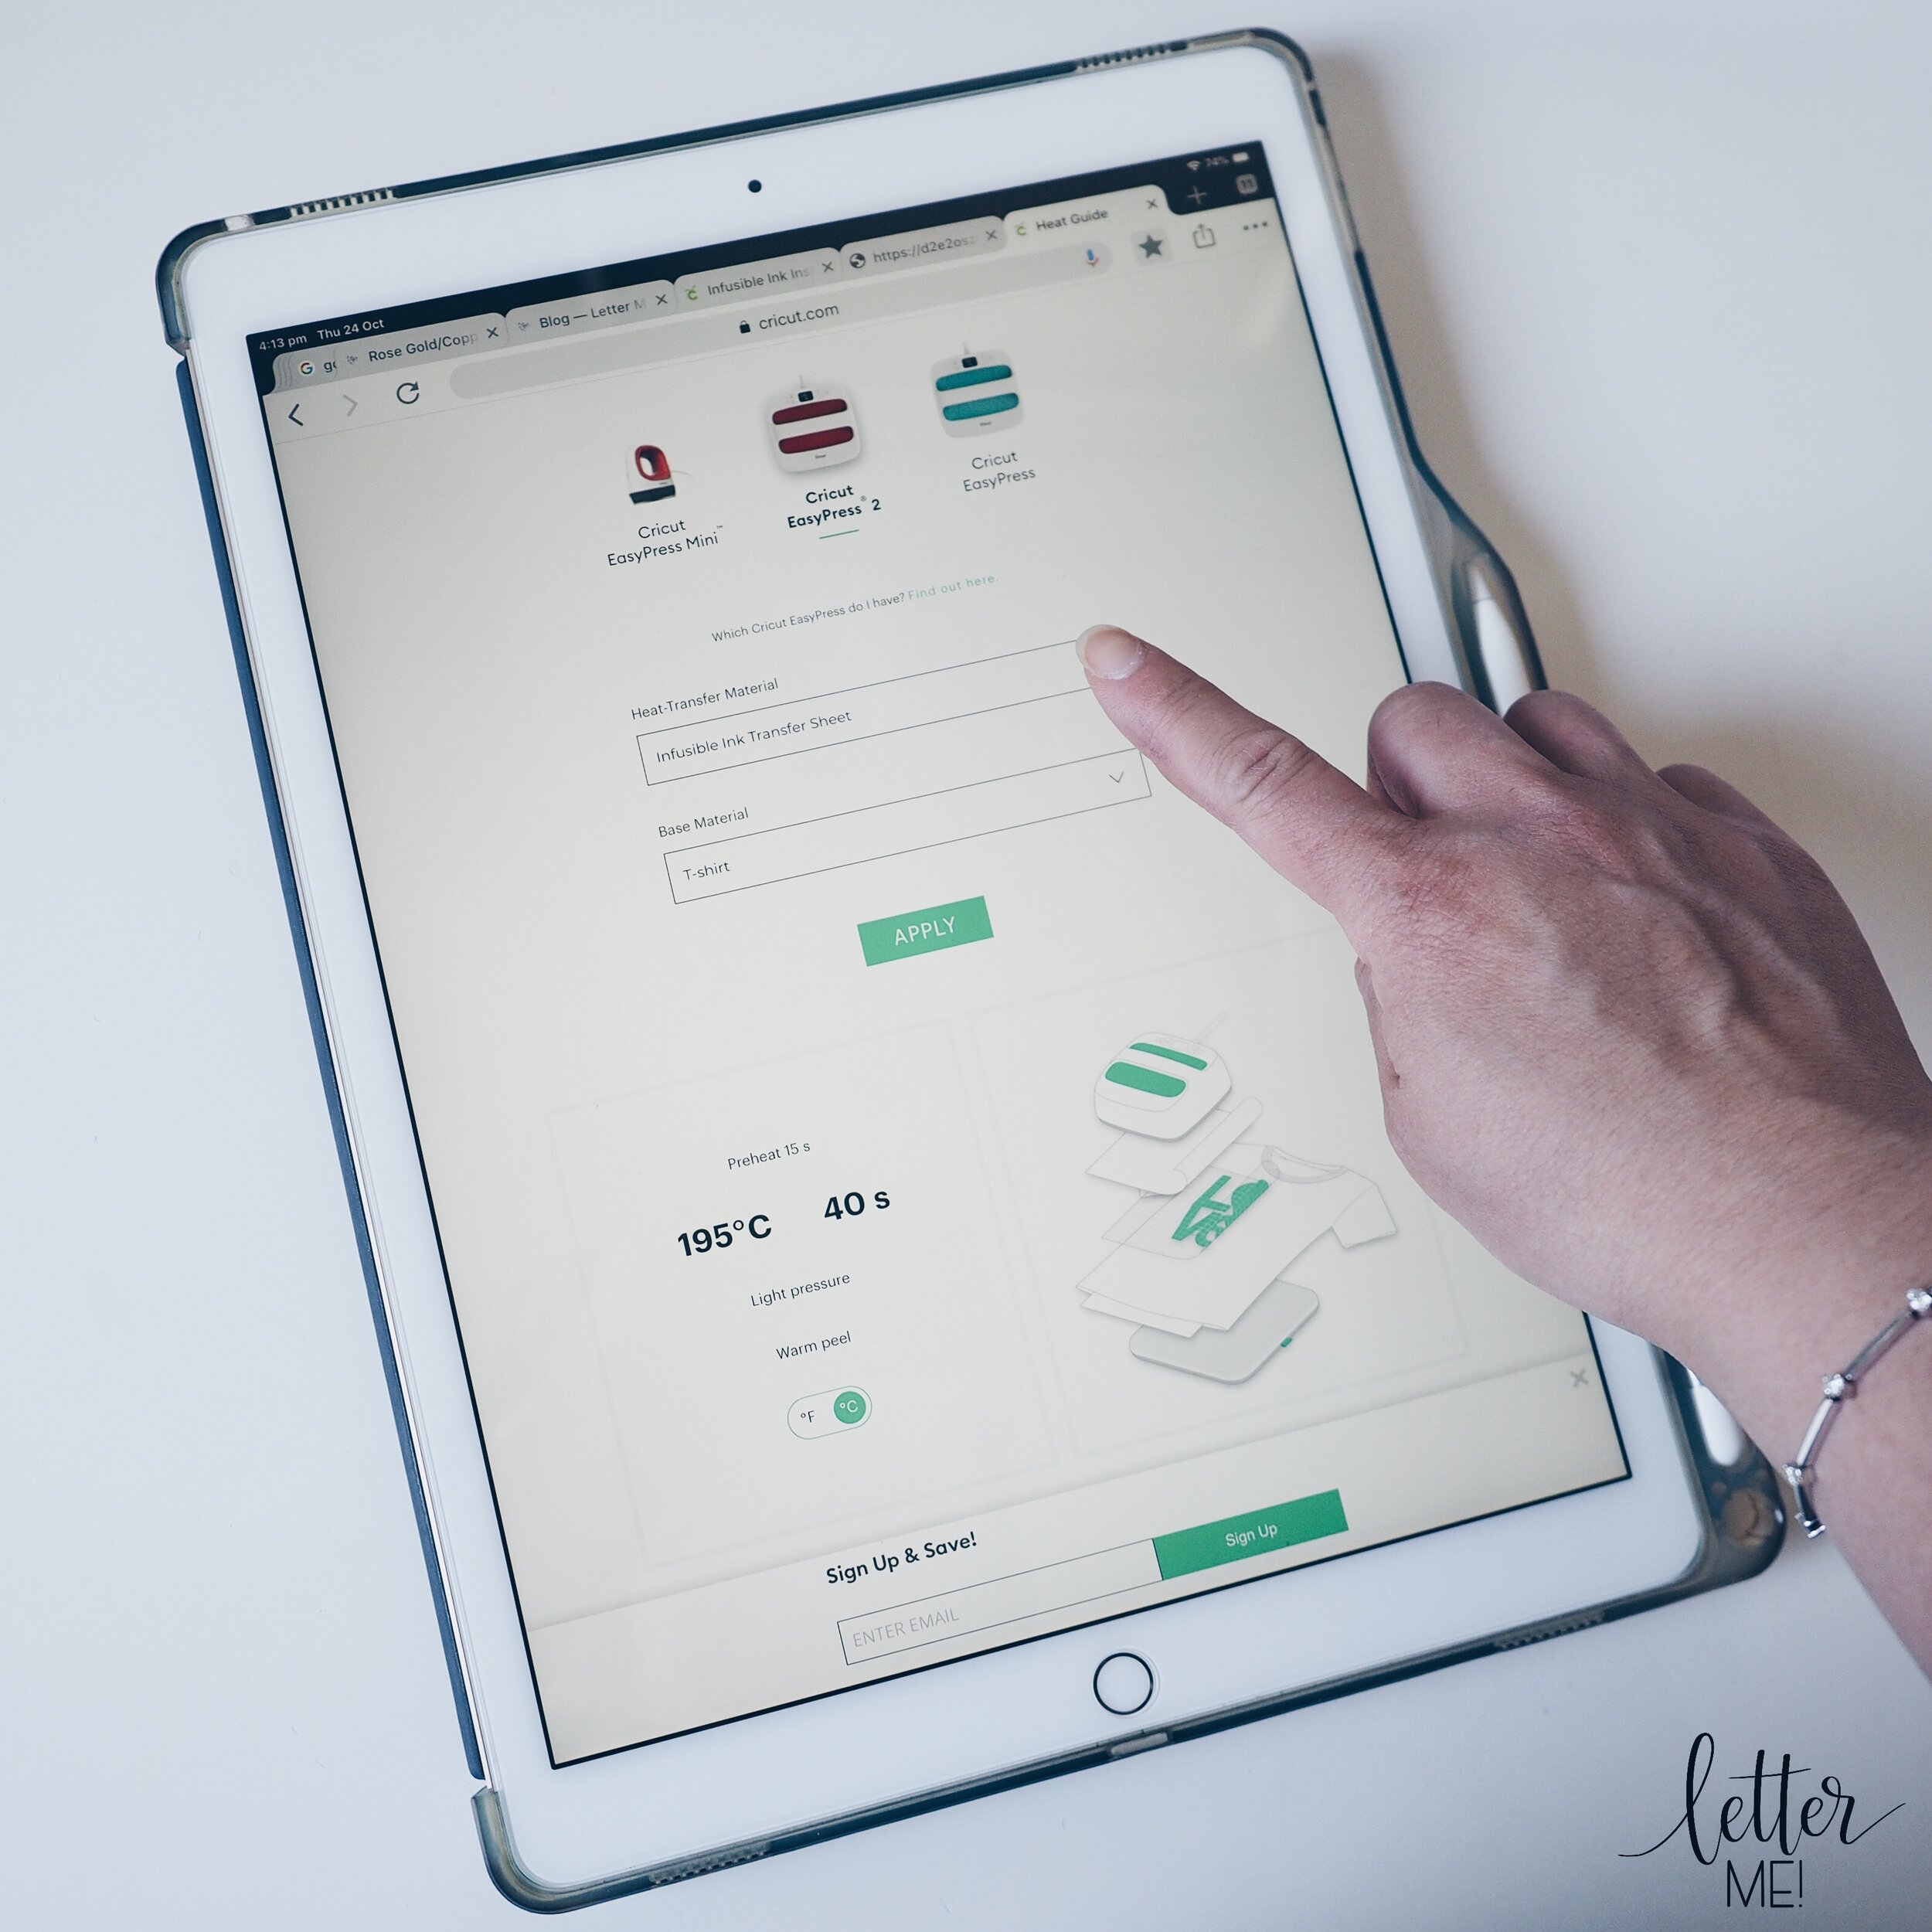
    Cricut Heat Guide (https://cricut.com/en_us/heatguide)

  • Cricut Maker cutting machine (Cricut.com, Amazon, Amazon Australia, Spotlight eBay)

  • Standard Grip Mat (Cricut.com, Amazon, Amazon Australia, Spotlight eBay)

  • Cricut EasyPress 2 (small) (Cricut.com, Amazon, Amazon Australia, Spotlight eBay)

  • Cricut EasyPress Mat (Cricut.com, Amazon, Amazon Australia, Spotlight eBay)

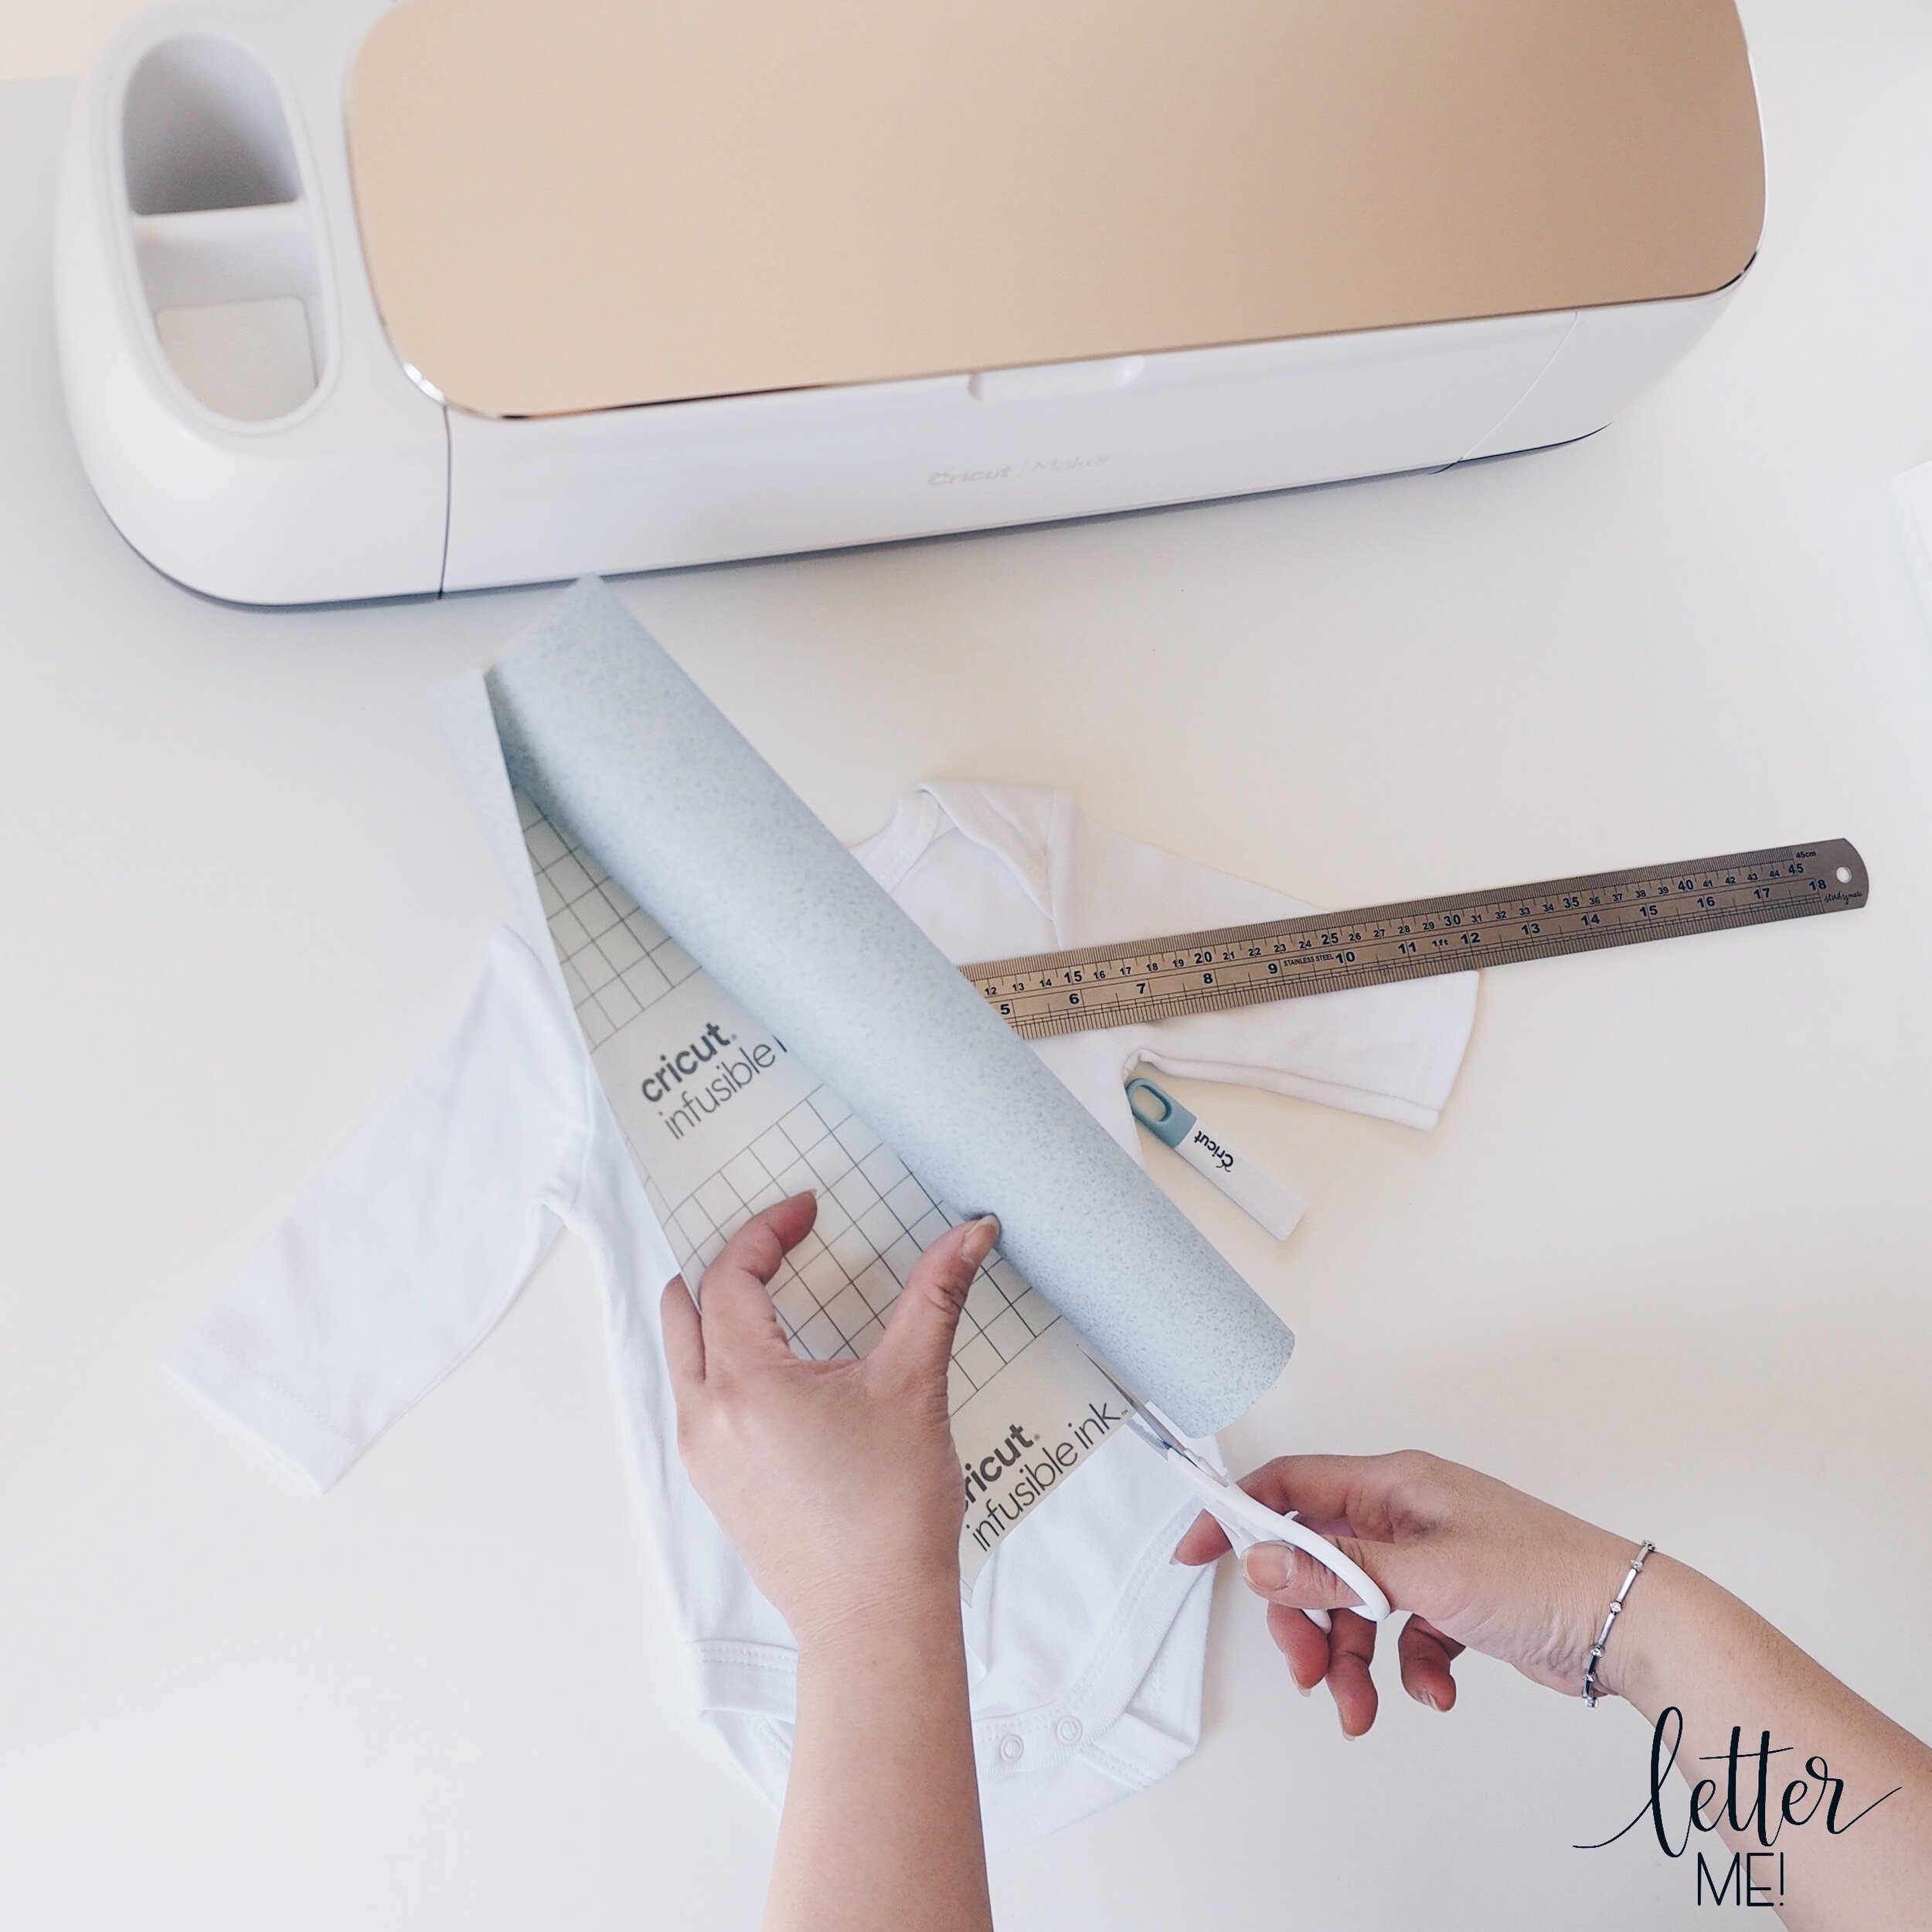
  • Baby onesie (Amazon, Amazon Australia, eBay)

  • Ruler (Amazon, Amazon Australia, eBay)

  • Scissors (Cricut.com, Amazon, Amazon Australia, Spotlight eBay)

  • Infusible Ink Transfer Sheet (Cricut.com, Amazon, Spotlight eBay)

  • Butcher Paper (included with transfer sheets)

  • Scrap cardboard

  • Lint roller (Amazon, Amazon Australia, eBay)

  • Weeding tool/Tweezers (Cricut.com, Amazon, Amazon Australia, Spotlight eBay)

Step One:

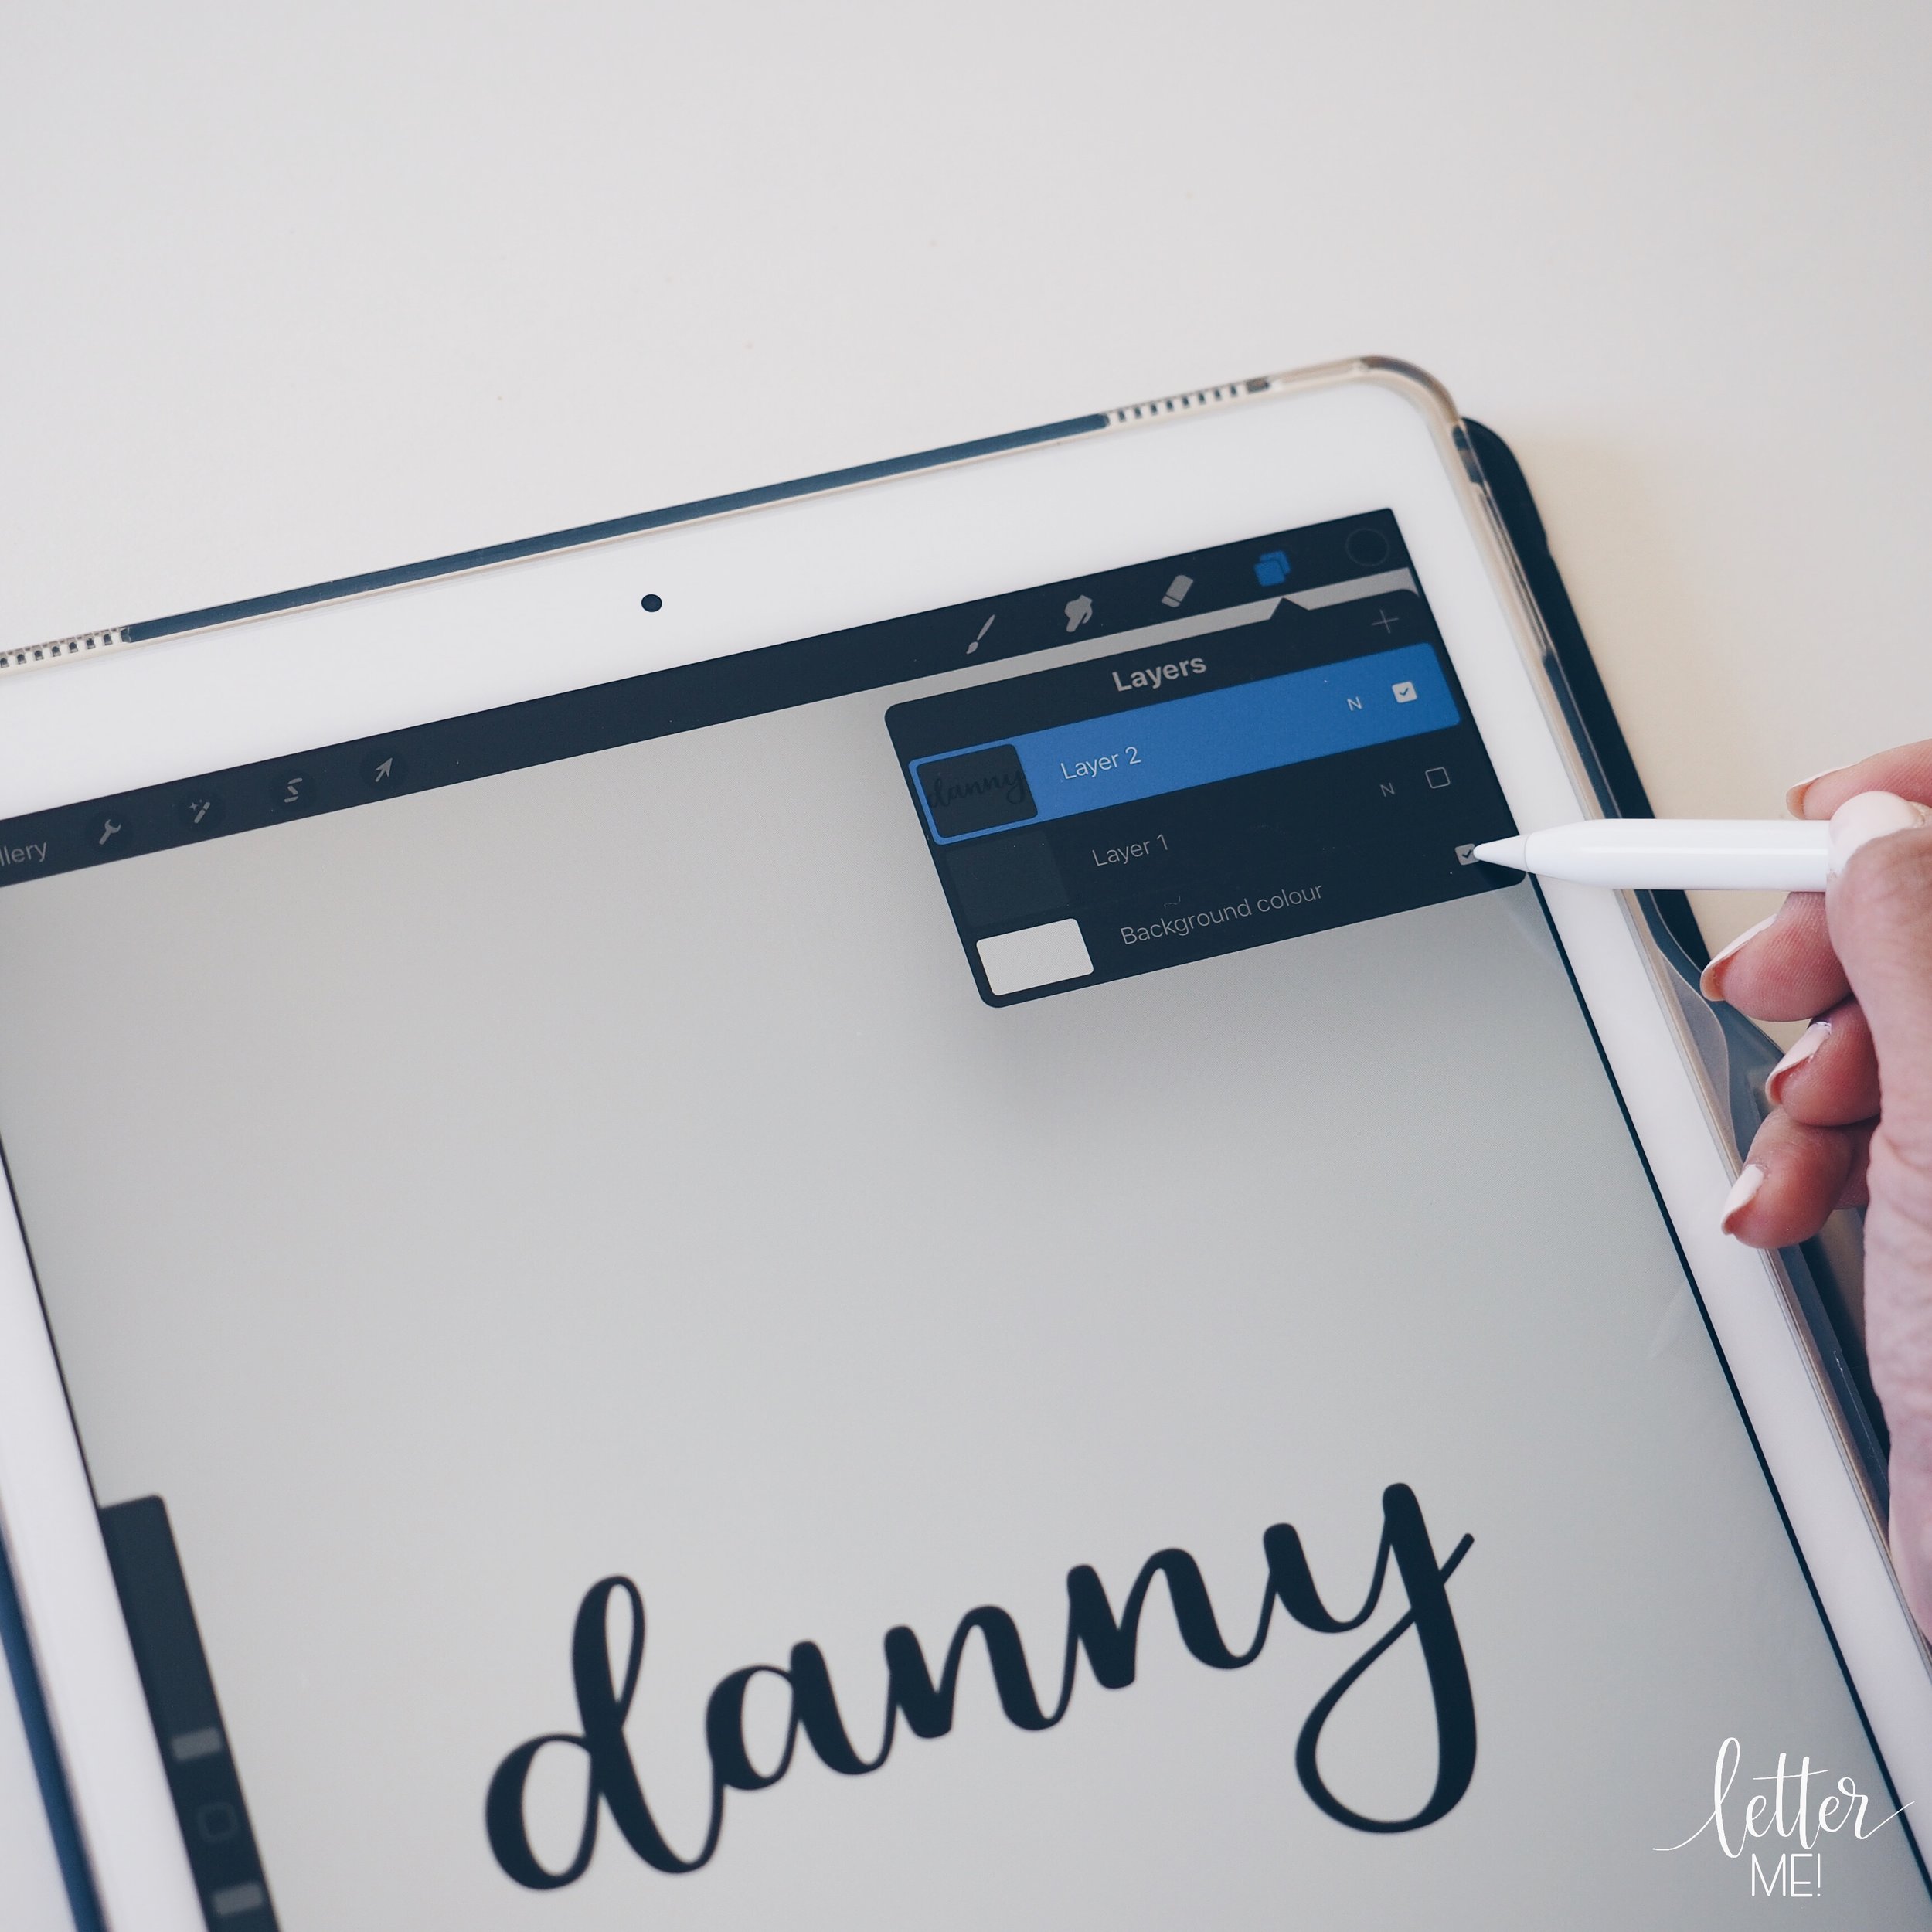
As a calligrapher, I like to personalise my onesies with my own artwork. For this project, I used my Apple iPad Pro and Pencil, along with the Procreate app to create my design “Even miracles take a little time”. You are welcome to check out my first Cricut blog, where I guide you step-by-step how to export a design from Procreate. Alternatively, you can use a design from the free Cricut software, Cricut Design Space.

C7196588-14FF-4358-BB95-54BCFC5227AB.JPG

Step Two:

Measure your project. In Cricut Design Space, size your artwork to fit your project. For me, my artwork was 4.5 inches in width. Remember to mirror your artwork.

4578ED19-F806-41DC-9219-05B98D5AB4A5.JPG

Step Three:

Cut a piece of Infusible Ink Transfer sheet to the desired size, and place it on a Standard Grip mat, with the liner side down (the coloured side is facing upwards).

75CE3F74-5731-462F-A3FE-830190F5E041.JPG
5096C65F-40C5-4BB4-B6C5-999EAA4FD9DD.JPG

Step Four:

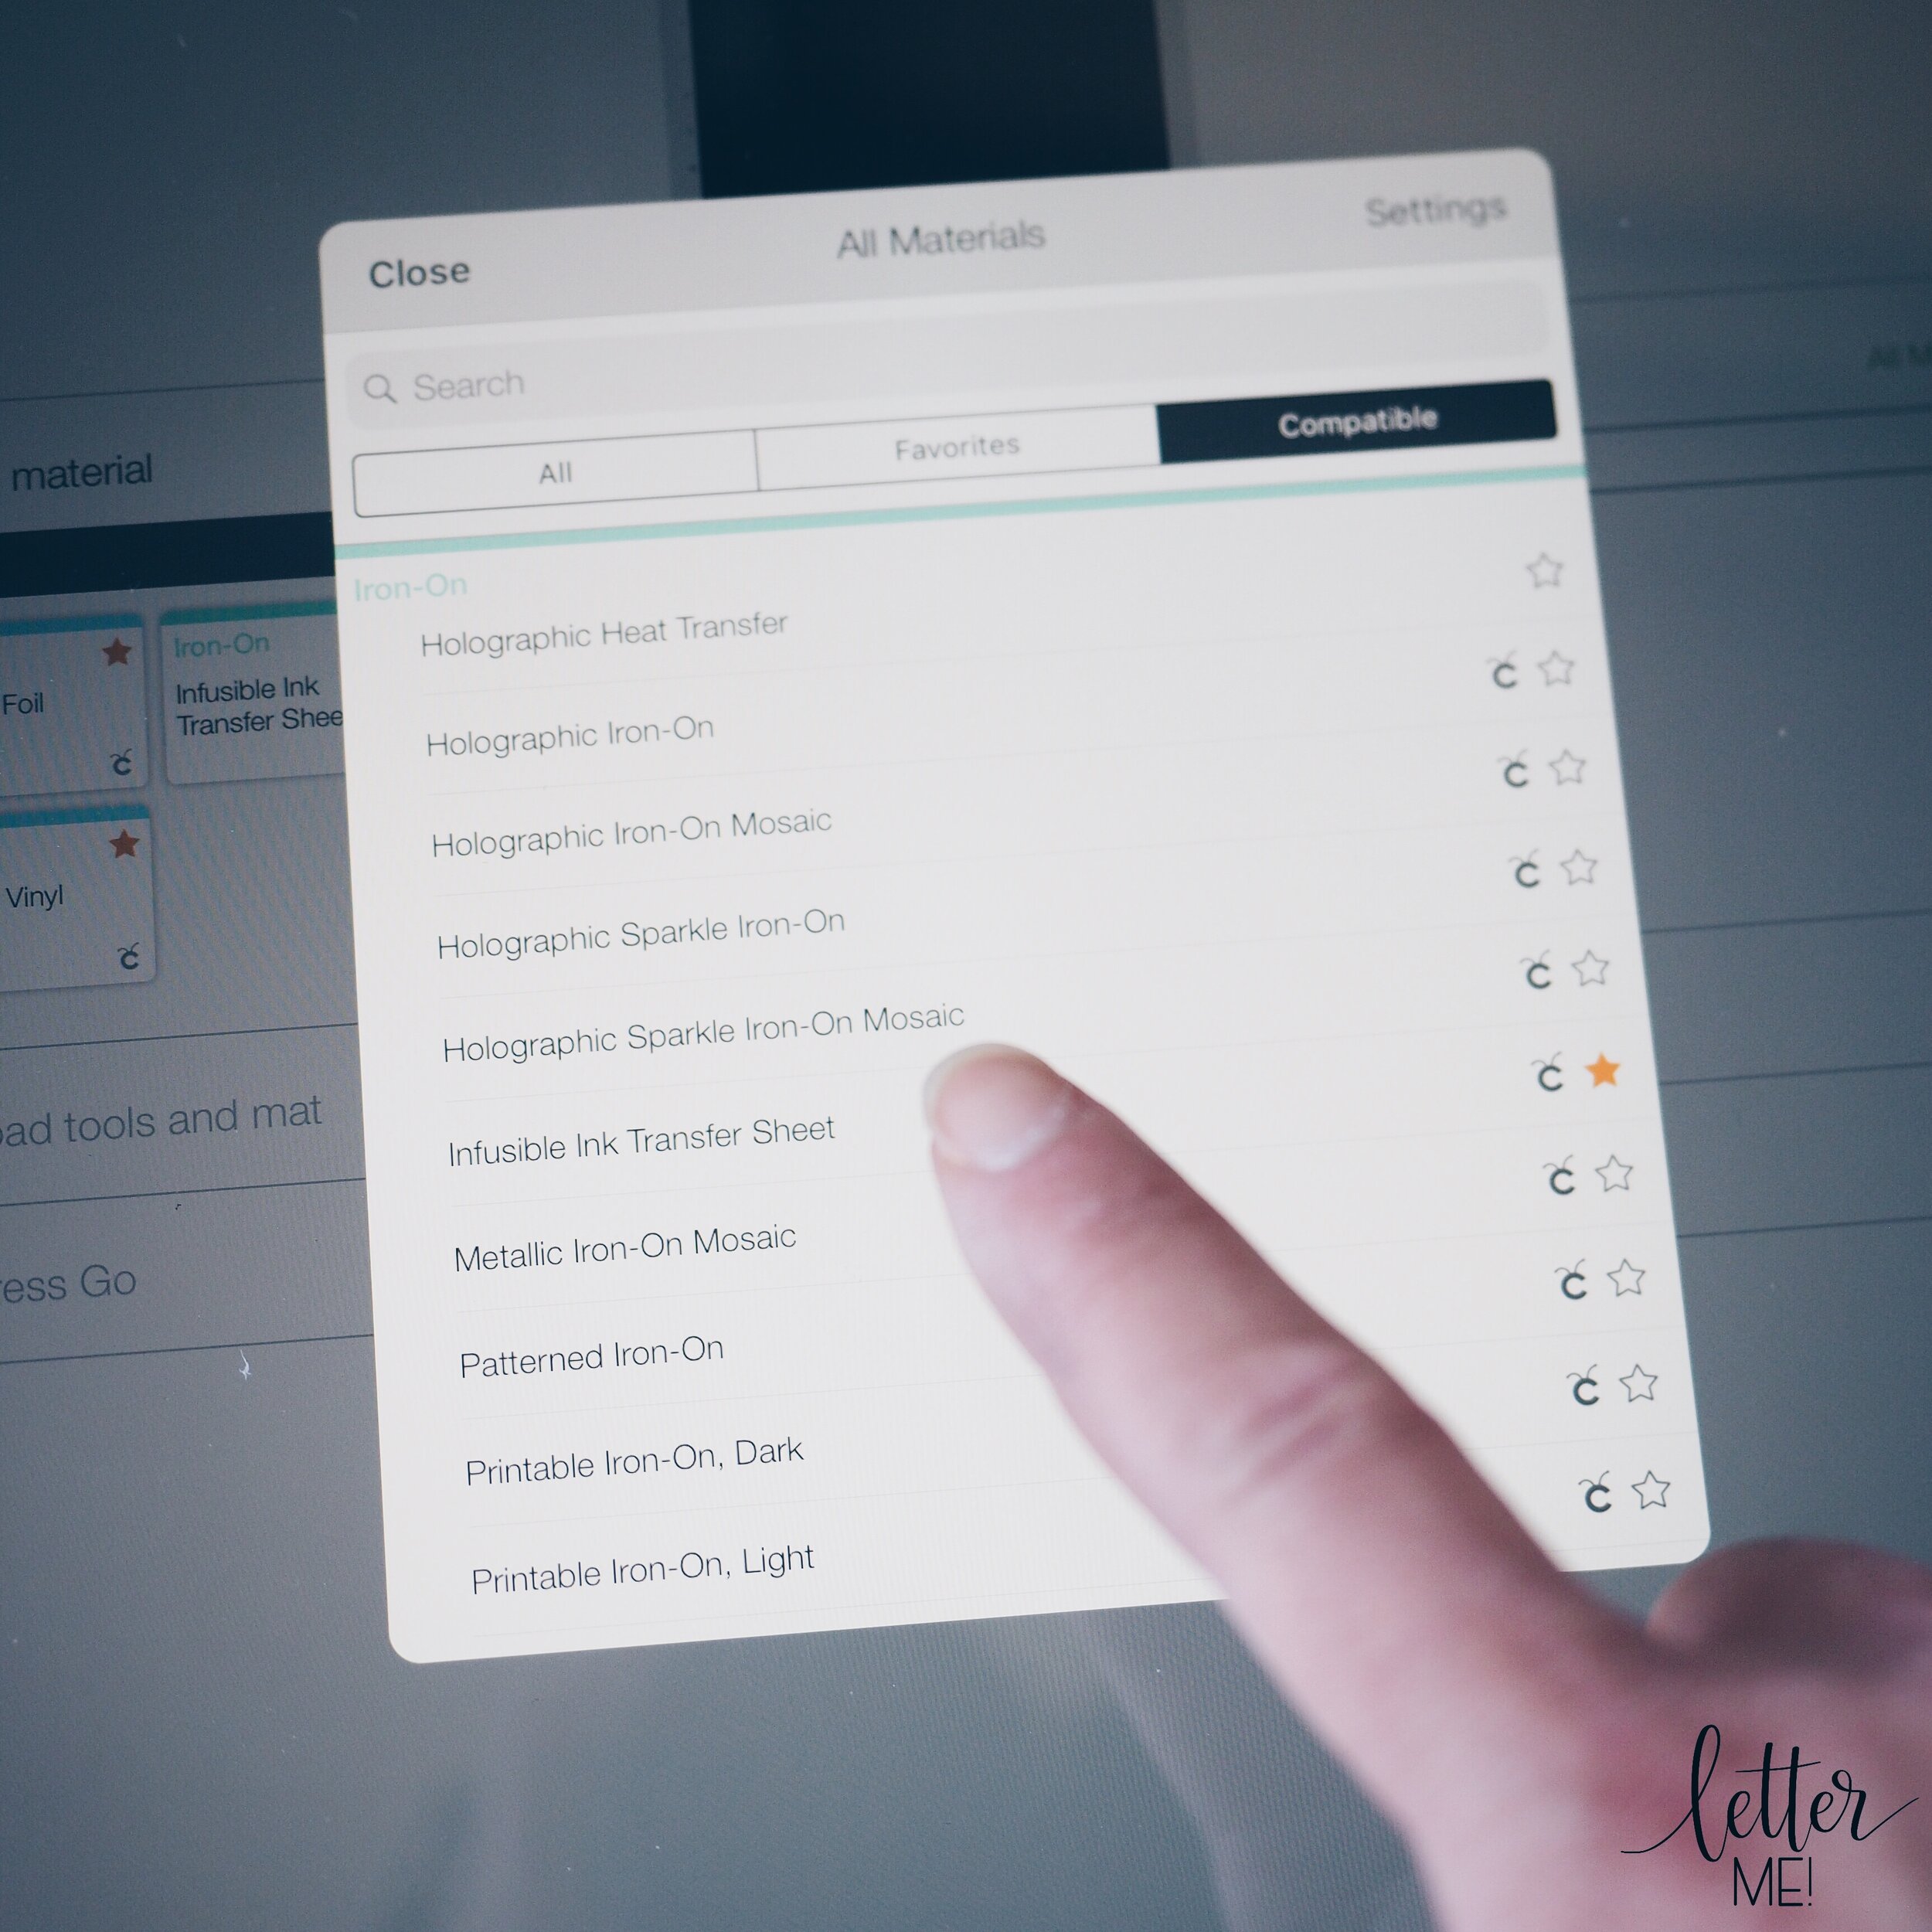
Load your prepared mat into your Cricut Maker machine. Browse all materials and seelct “Infusible Ink Transfer Sheet” and you are ready to cut!! (If you have a Cricut Explore machine, set the dial to “custom”).

Press the flashing GO button and you’re ready to Cut!

E00ADC4F-90F2-4B9B-8FBA-9C13C8C0470E.JPG

Step Five:

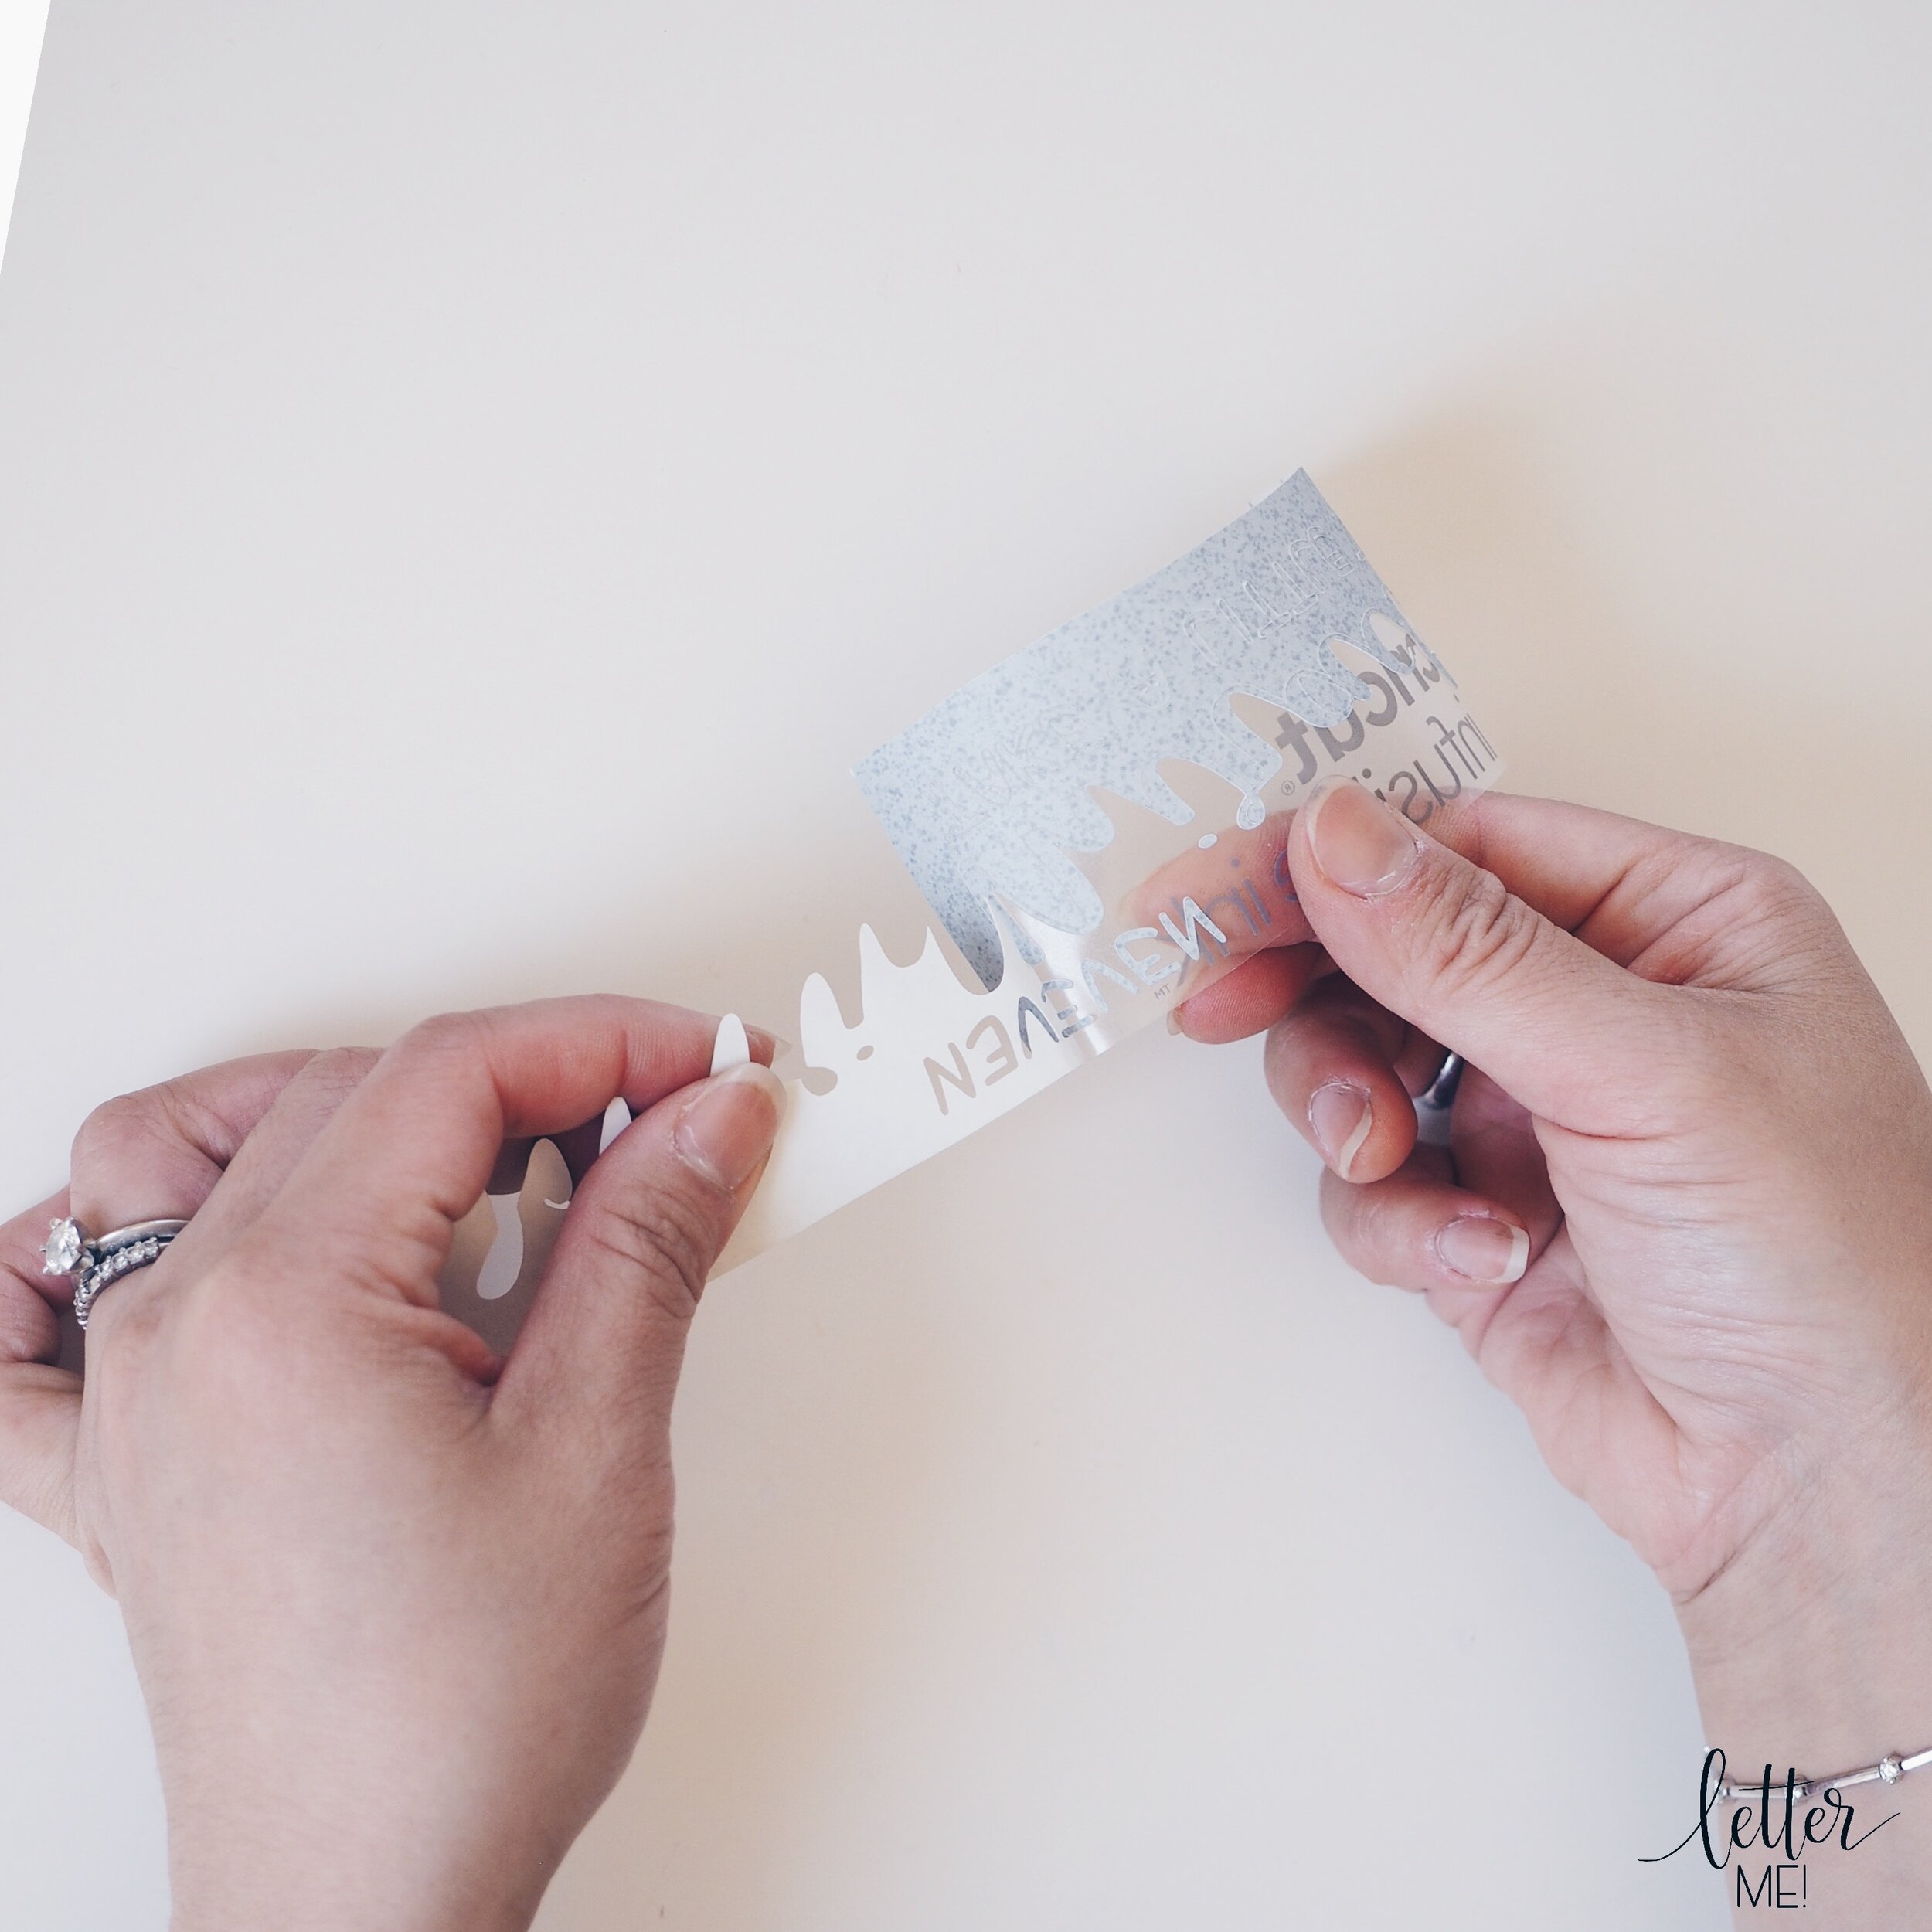
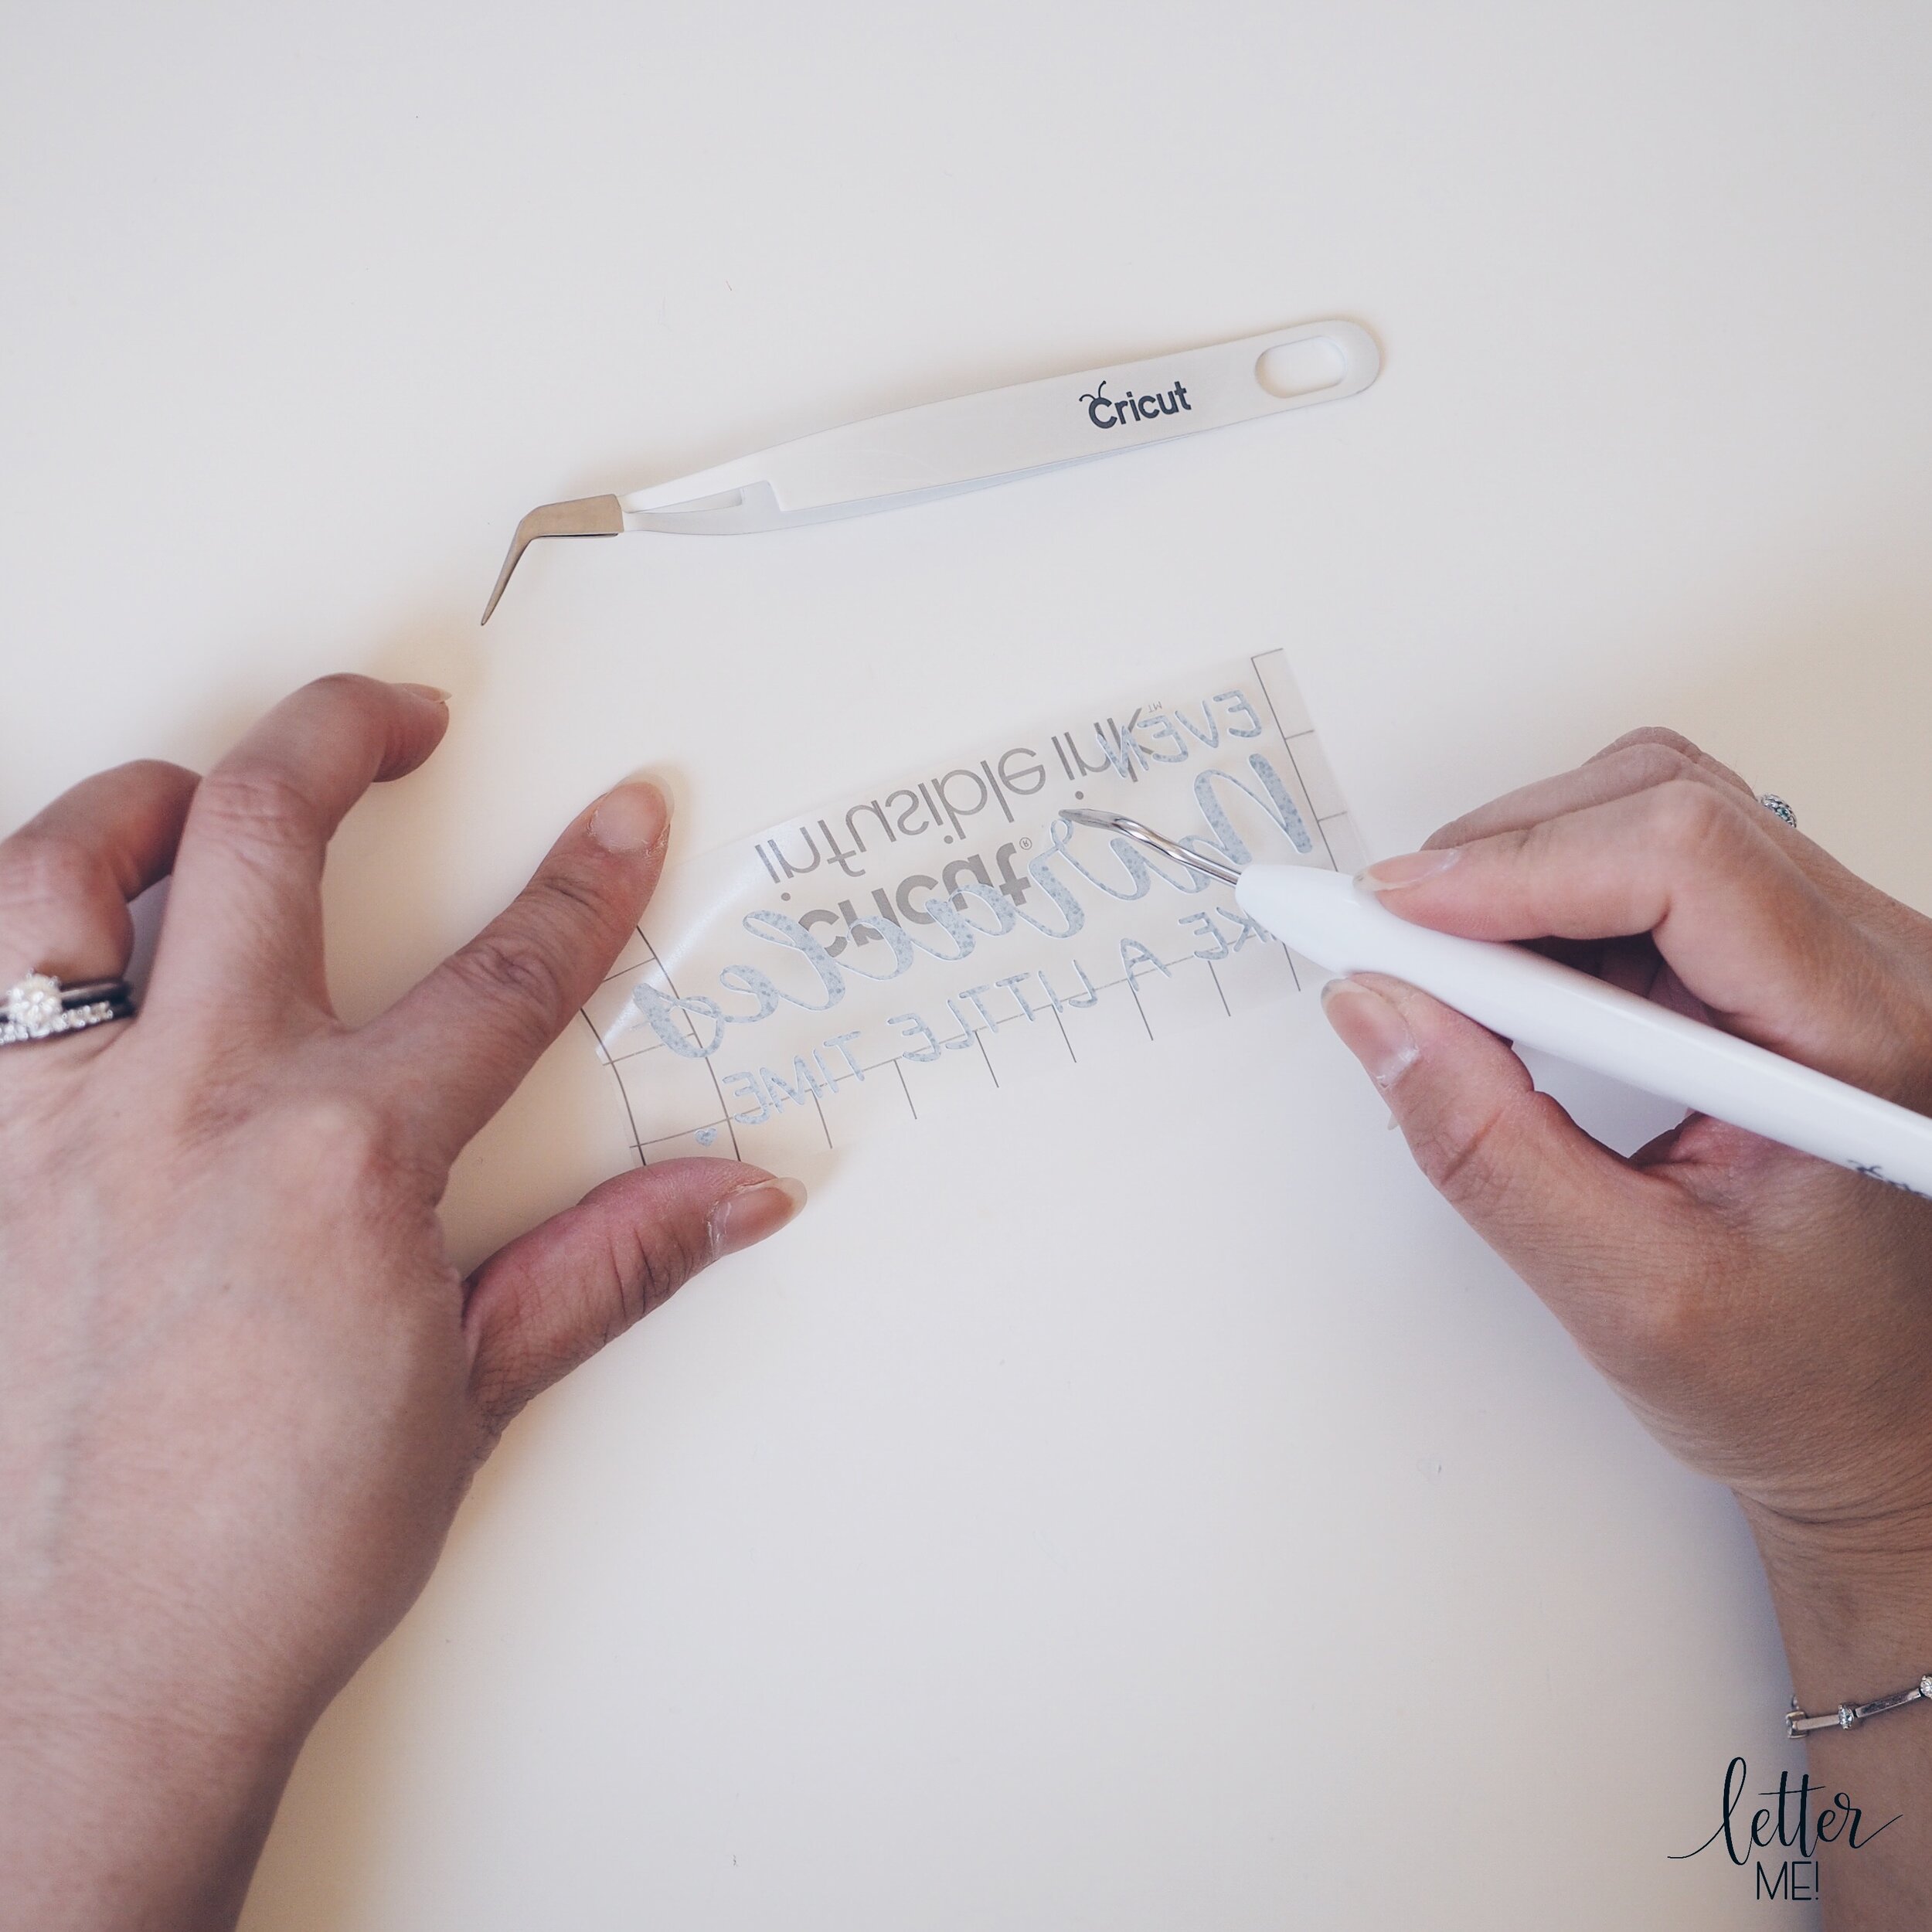
Unload your mat, and gently remove your cut design off the StandardGrip mat. Keep your design on the clear liner (do not remove it off the liner as you will be ironing over this!), using the “rolling and cracking” technique, lightly roll your design to separate the design from the excess. Then you crack the cut and peel off the excess paper. You may use a weeding tool or tweezers to assist with removing smaller excess bits and the negative space.

FE35BA84-D9B9-4DBD-B4E5-3FA76DA86ED2.JPG
D144FECA-7292-4856-8349-F5644D22B761.JPG
3DFD1FF2-671C-4D11-B617-C3B112E53C79.JPG

Step Six:

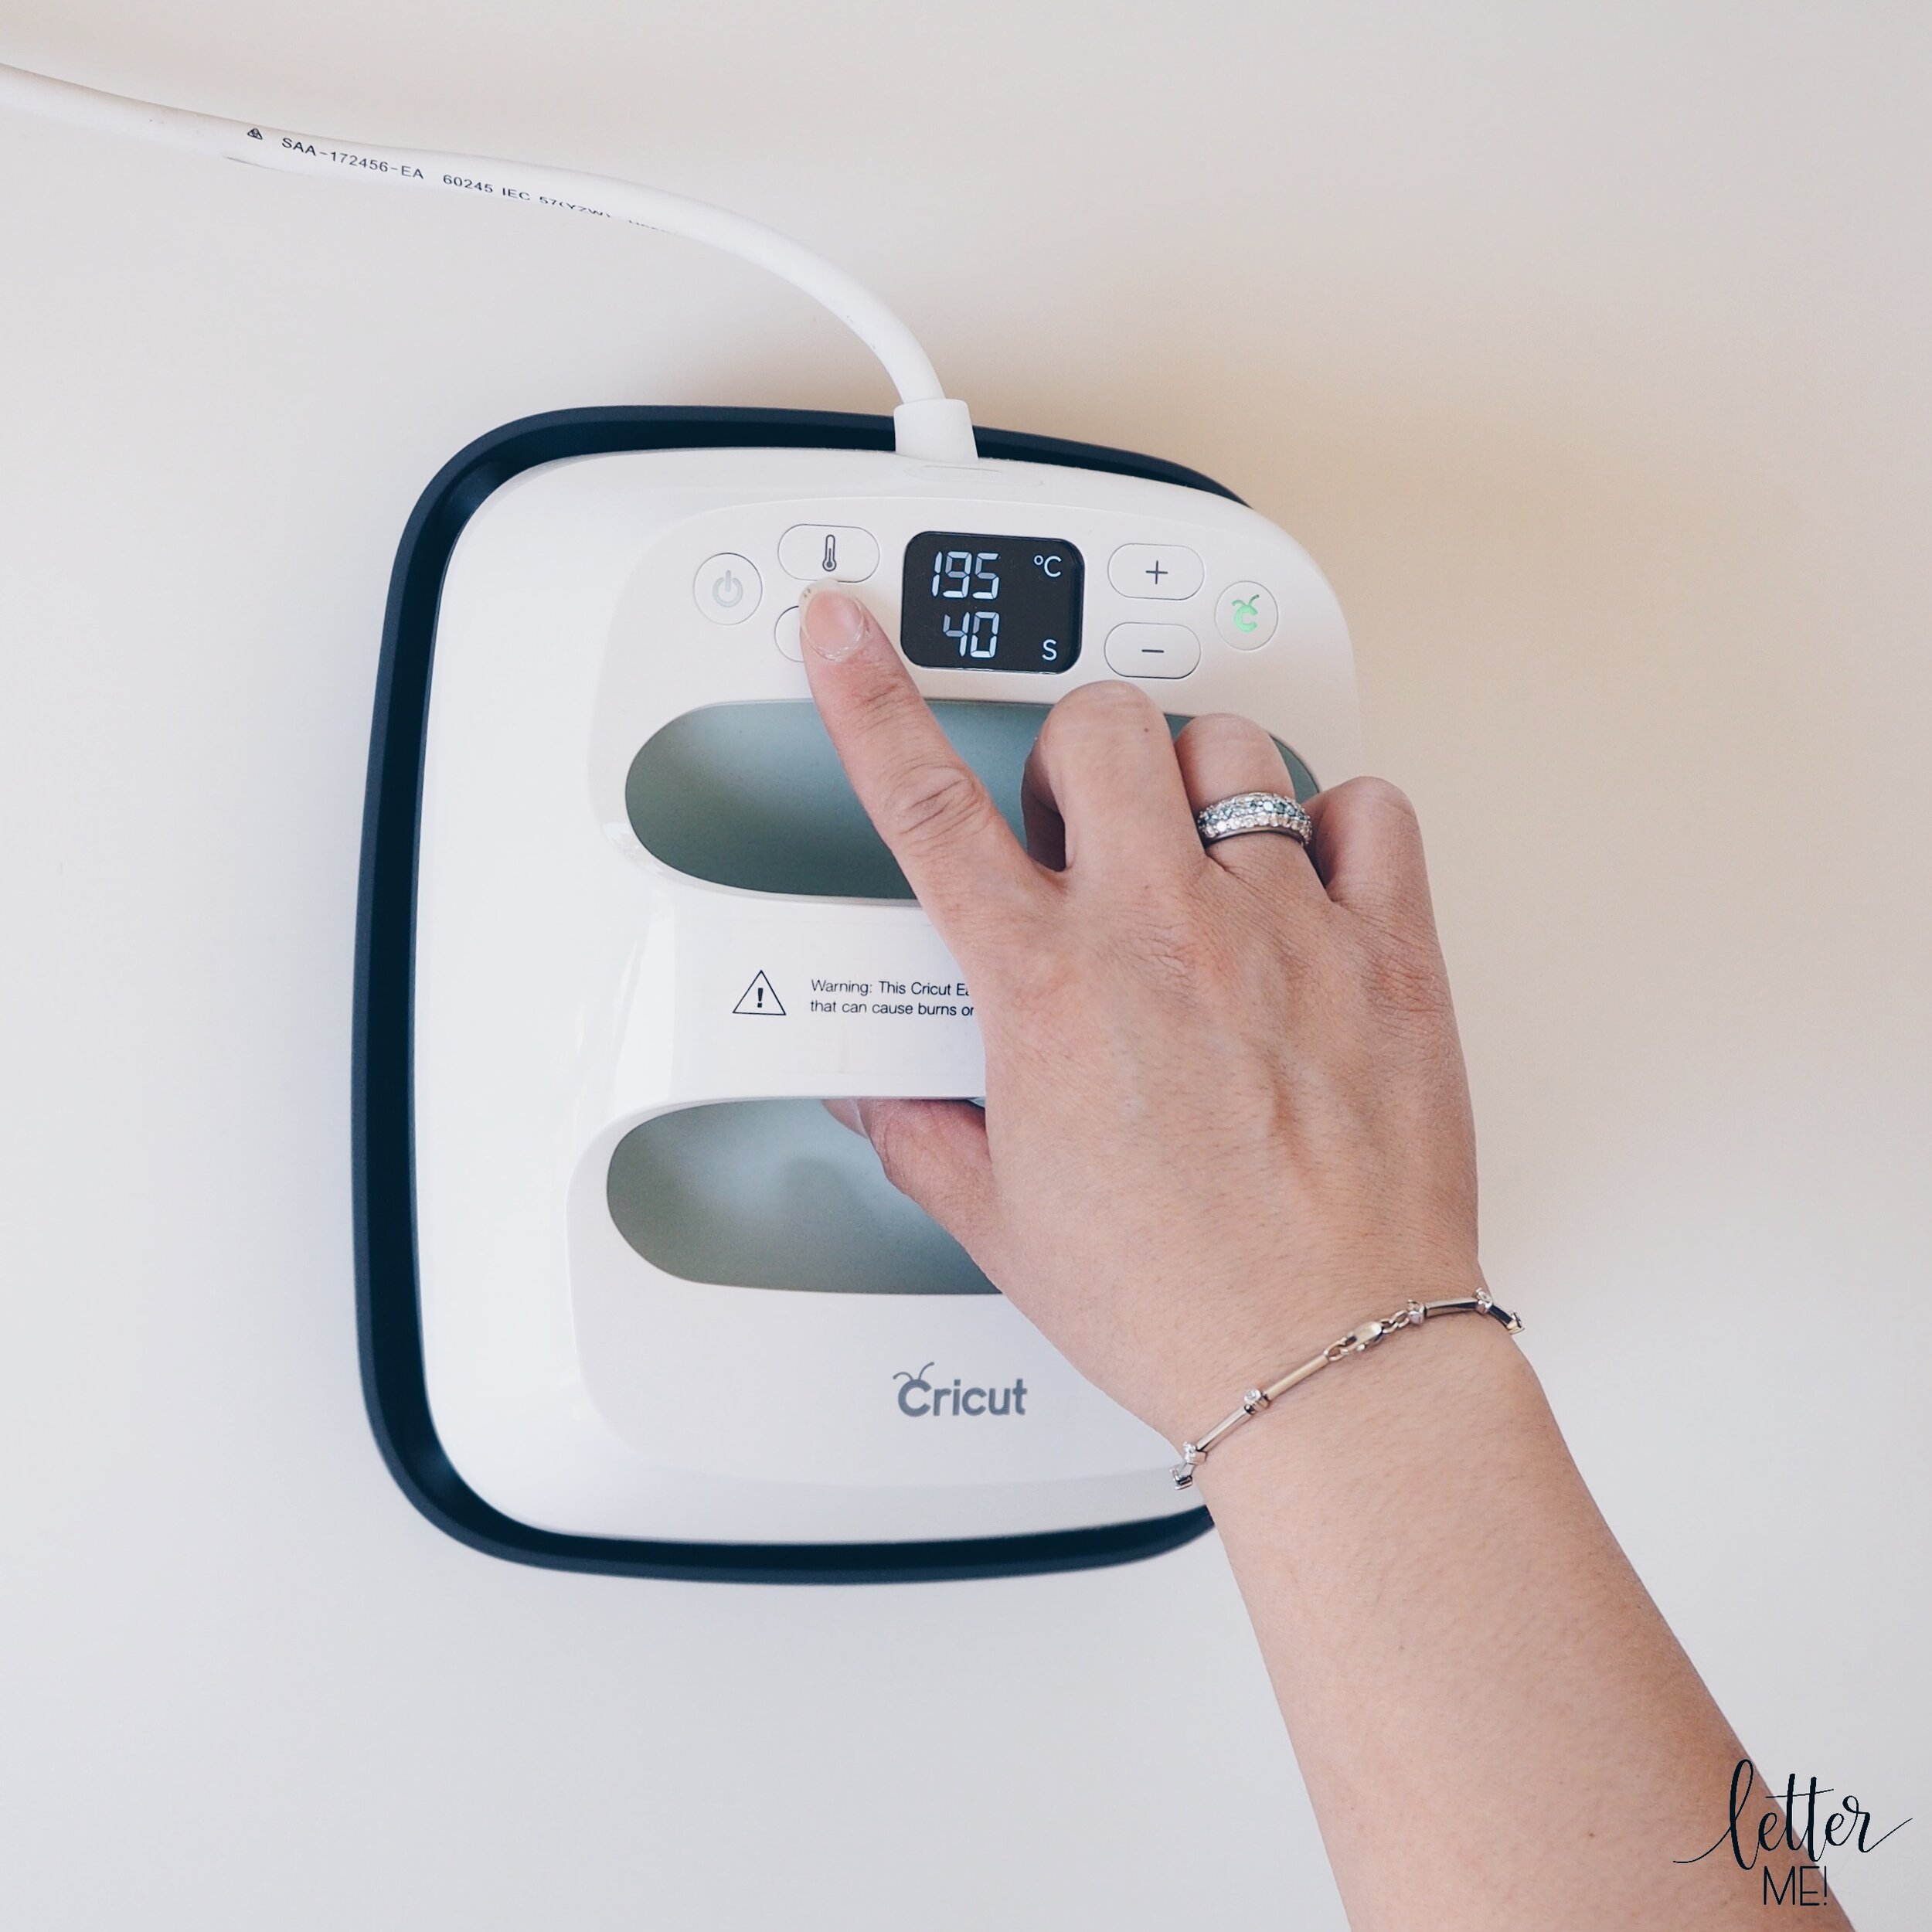
Prep your Easy Press 2 and your garment. To find out the exact heat settings suitable for your project, use the free online resource, Cricut Heat Guide.

For this project, I heated my EasyPress to 195 degrees celcius, then ironed my baby onesie for 15 seconds using the EasyPress on the EasyPress Mat, so that the surface was wrinkle and moisture free.

305F0B19-D334-4CB3-9C74-3C605A23CA19.JPG
9BECC21E-434B-4846-9EA5-B32C07A10886.JPG

Step Seven:

Place a piece of cardboard inside your garment to protect the garment and the EasyPress Mat from the Infusible Ink. For my onesie, I had to unbutton the bottom and insert the cardboard through the bottom.

51718B28-3968-473A-81B4-E3699ABC7A7F.JPG

Step Eight:

Use a lint roller to remove any dust, lint, debris or fibre from the surface of your garment.

FF4B2BB9-3C07-4F2B-A39A-049E431B3276.JPG

Step Nine:

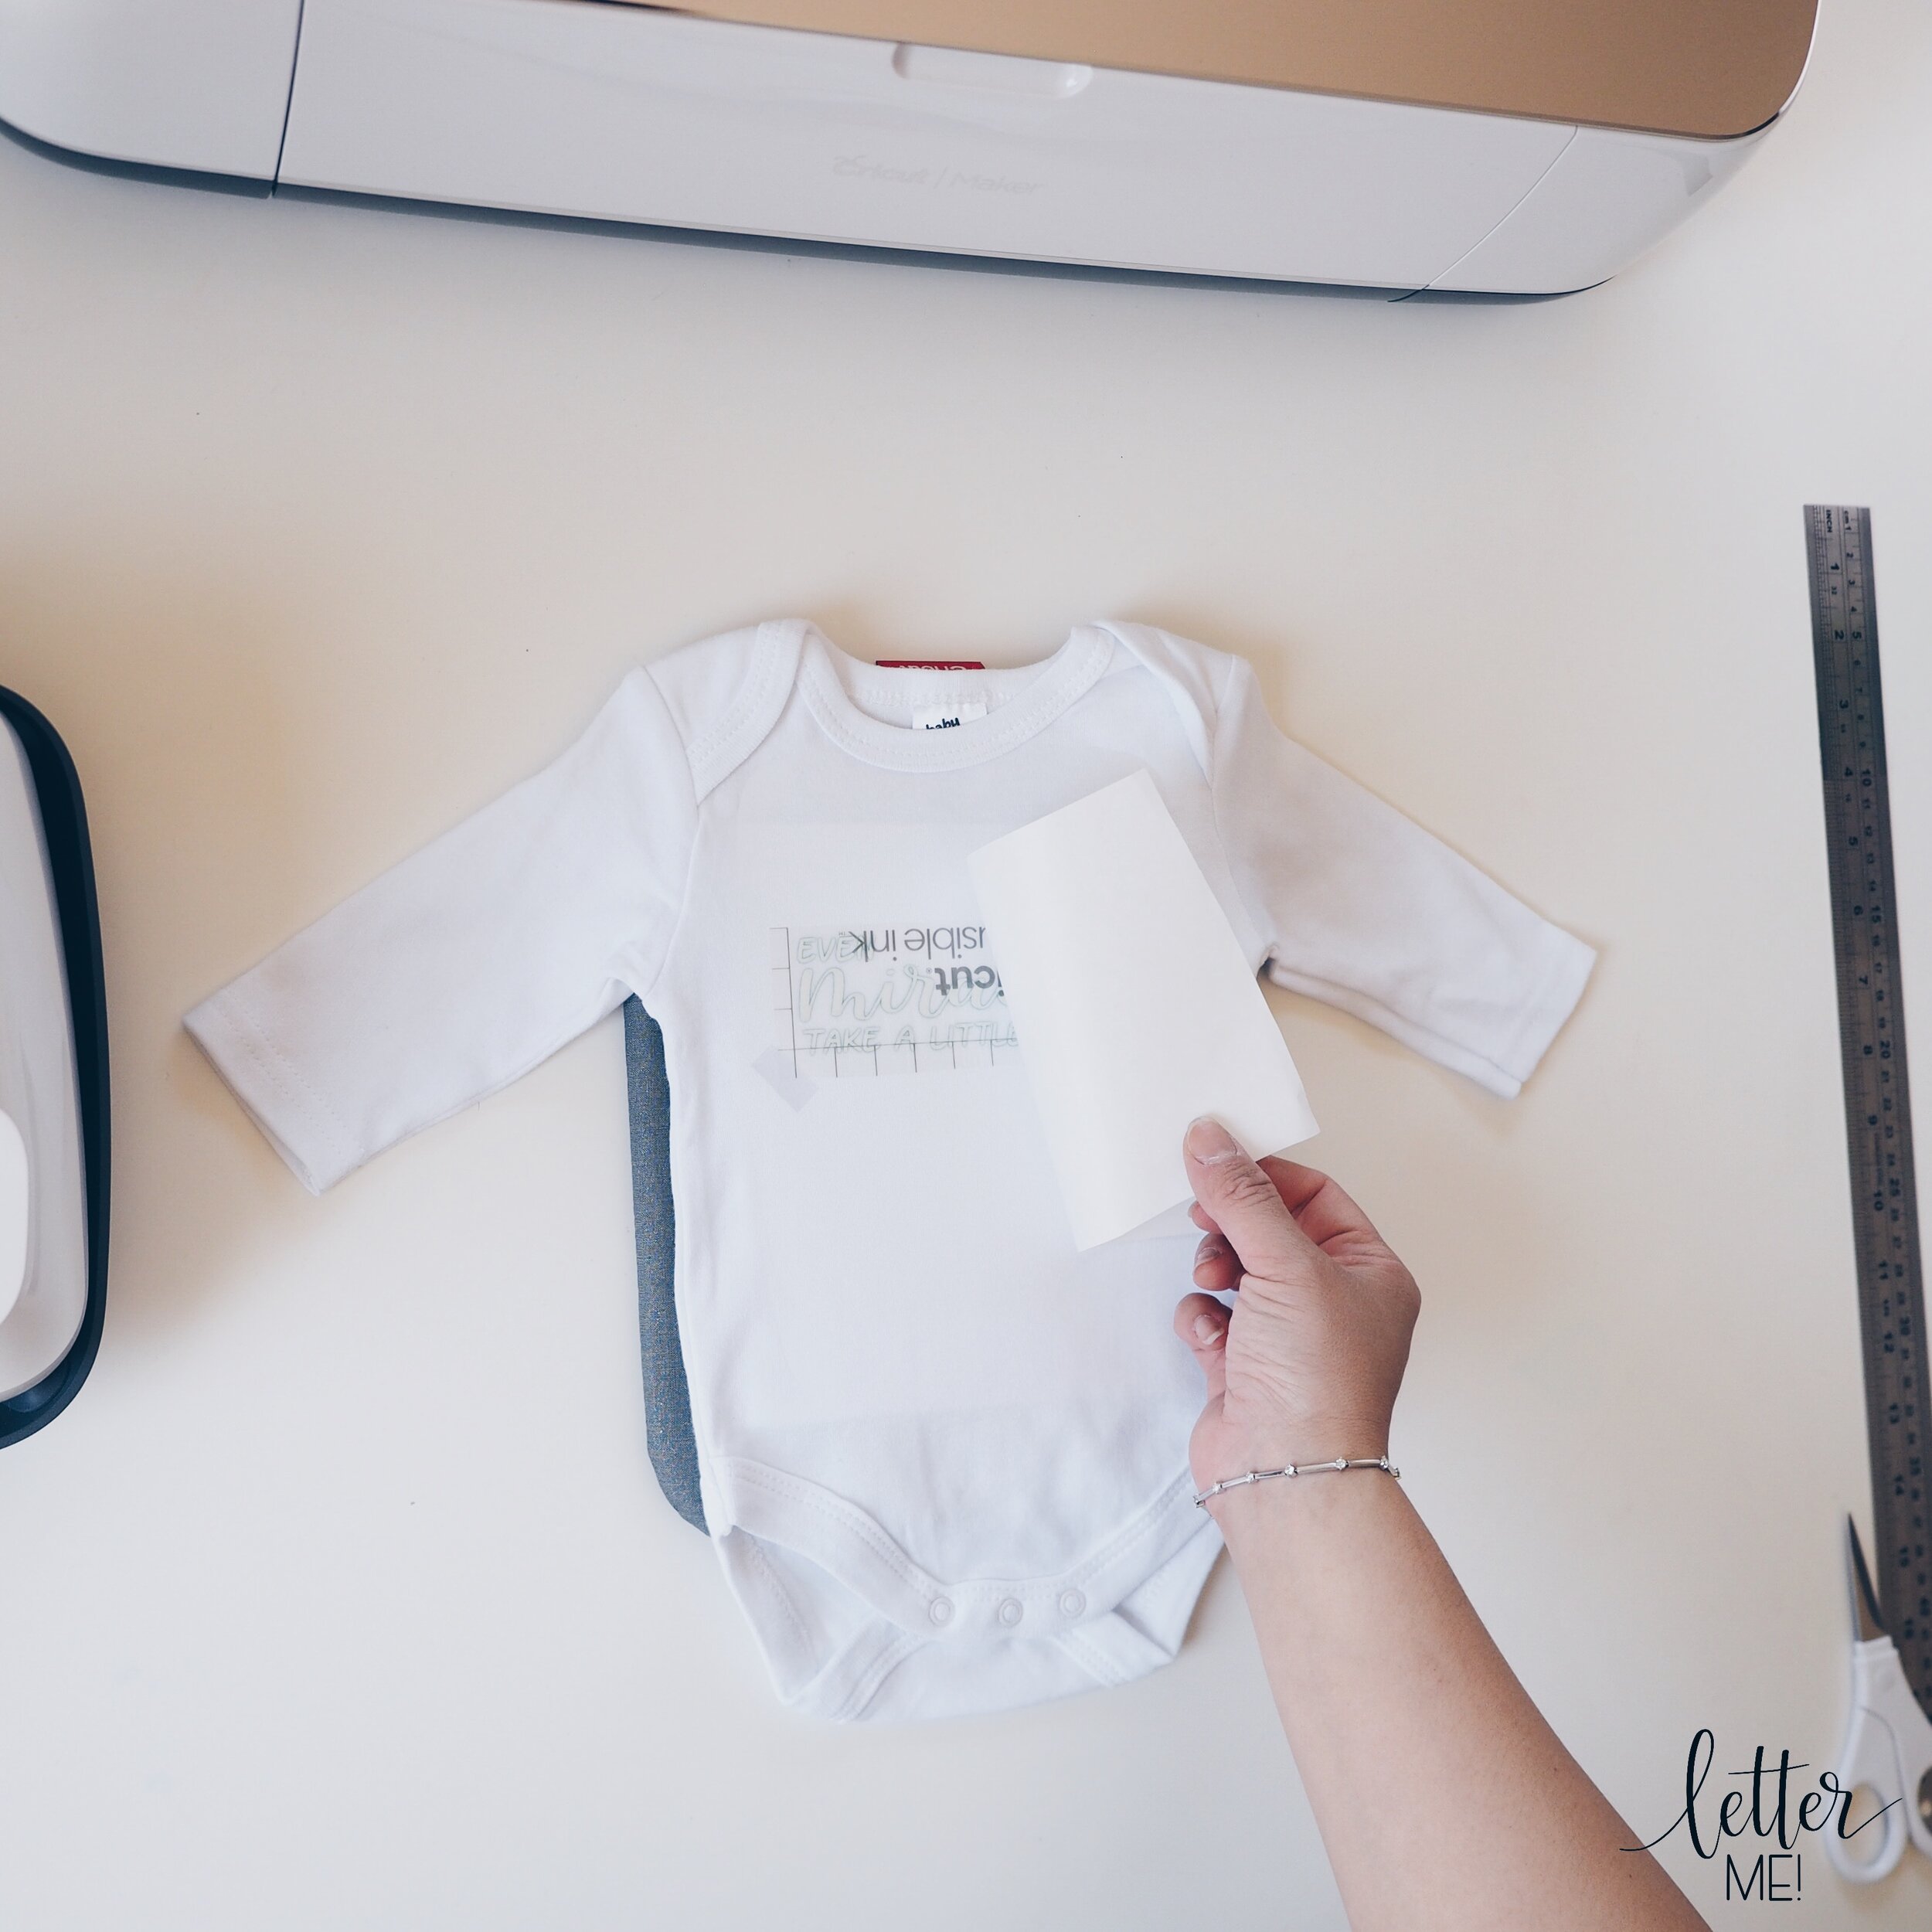
Place your design on your garment, face down, with the clear liner facing upwards. Your design should be the right way up. For me, I could read “Even miracles take a bit of time”. You may use heat proof tape to hold your design down if you are worried about it moving out of place.

2FFDCEEF-6ABC-46D6-B35B-97822AE8622F.JPG

Step Ten:

Cover your design with butcher paper (included with the Infusible Ink Transfer Sheets). Make sure that the butcher paper is larger than the heat plate of the EasyPress.

DB86D38F-660D-436F-A5BF-FA0DC077A6AA.JPG

Step Eleven:

Now you are ready to press your design! Press the EasyPress down on your garment for 40 seconds at the recommended temperature (mine was at 195 degrees celsius). Keep the EasyPress steady so that the Infusible Ink does not move during the transfer. When the EasyPress beeps, slowly remove the EasyPress without moving the butcher paper or the transfer sheet.

96A34956-822F-4AC1-BFCC-E42DAF73D3DC.JPG

Step Twelve:

Wait patiently (very difficult for me!) for your garment to cool. Once it is cool, slowly remove the butcher paper and carefully peel off the liner with the design on it.

B826B877-6521-4DCB-8664-9D94E5D6863C.JPG
E4C1BB9B-CD41-4D46-820E-CE26B4195ED1.JPG
117D84E2-2B5A-4EE4-80B1-E84C88F6AE82.JPG

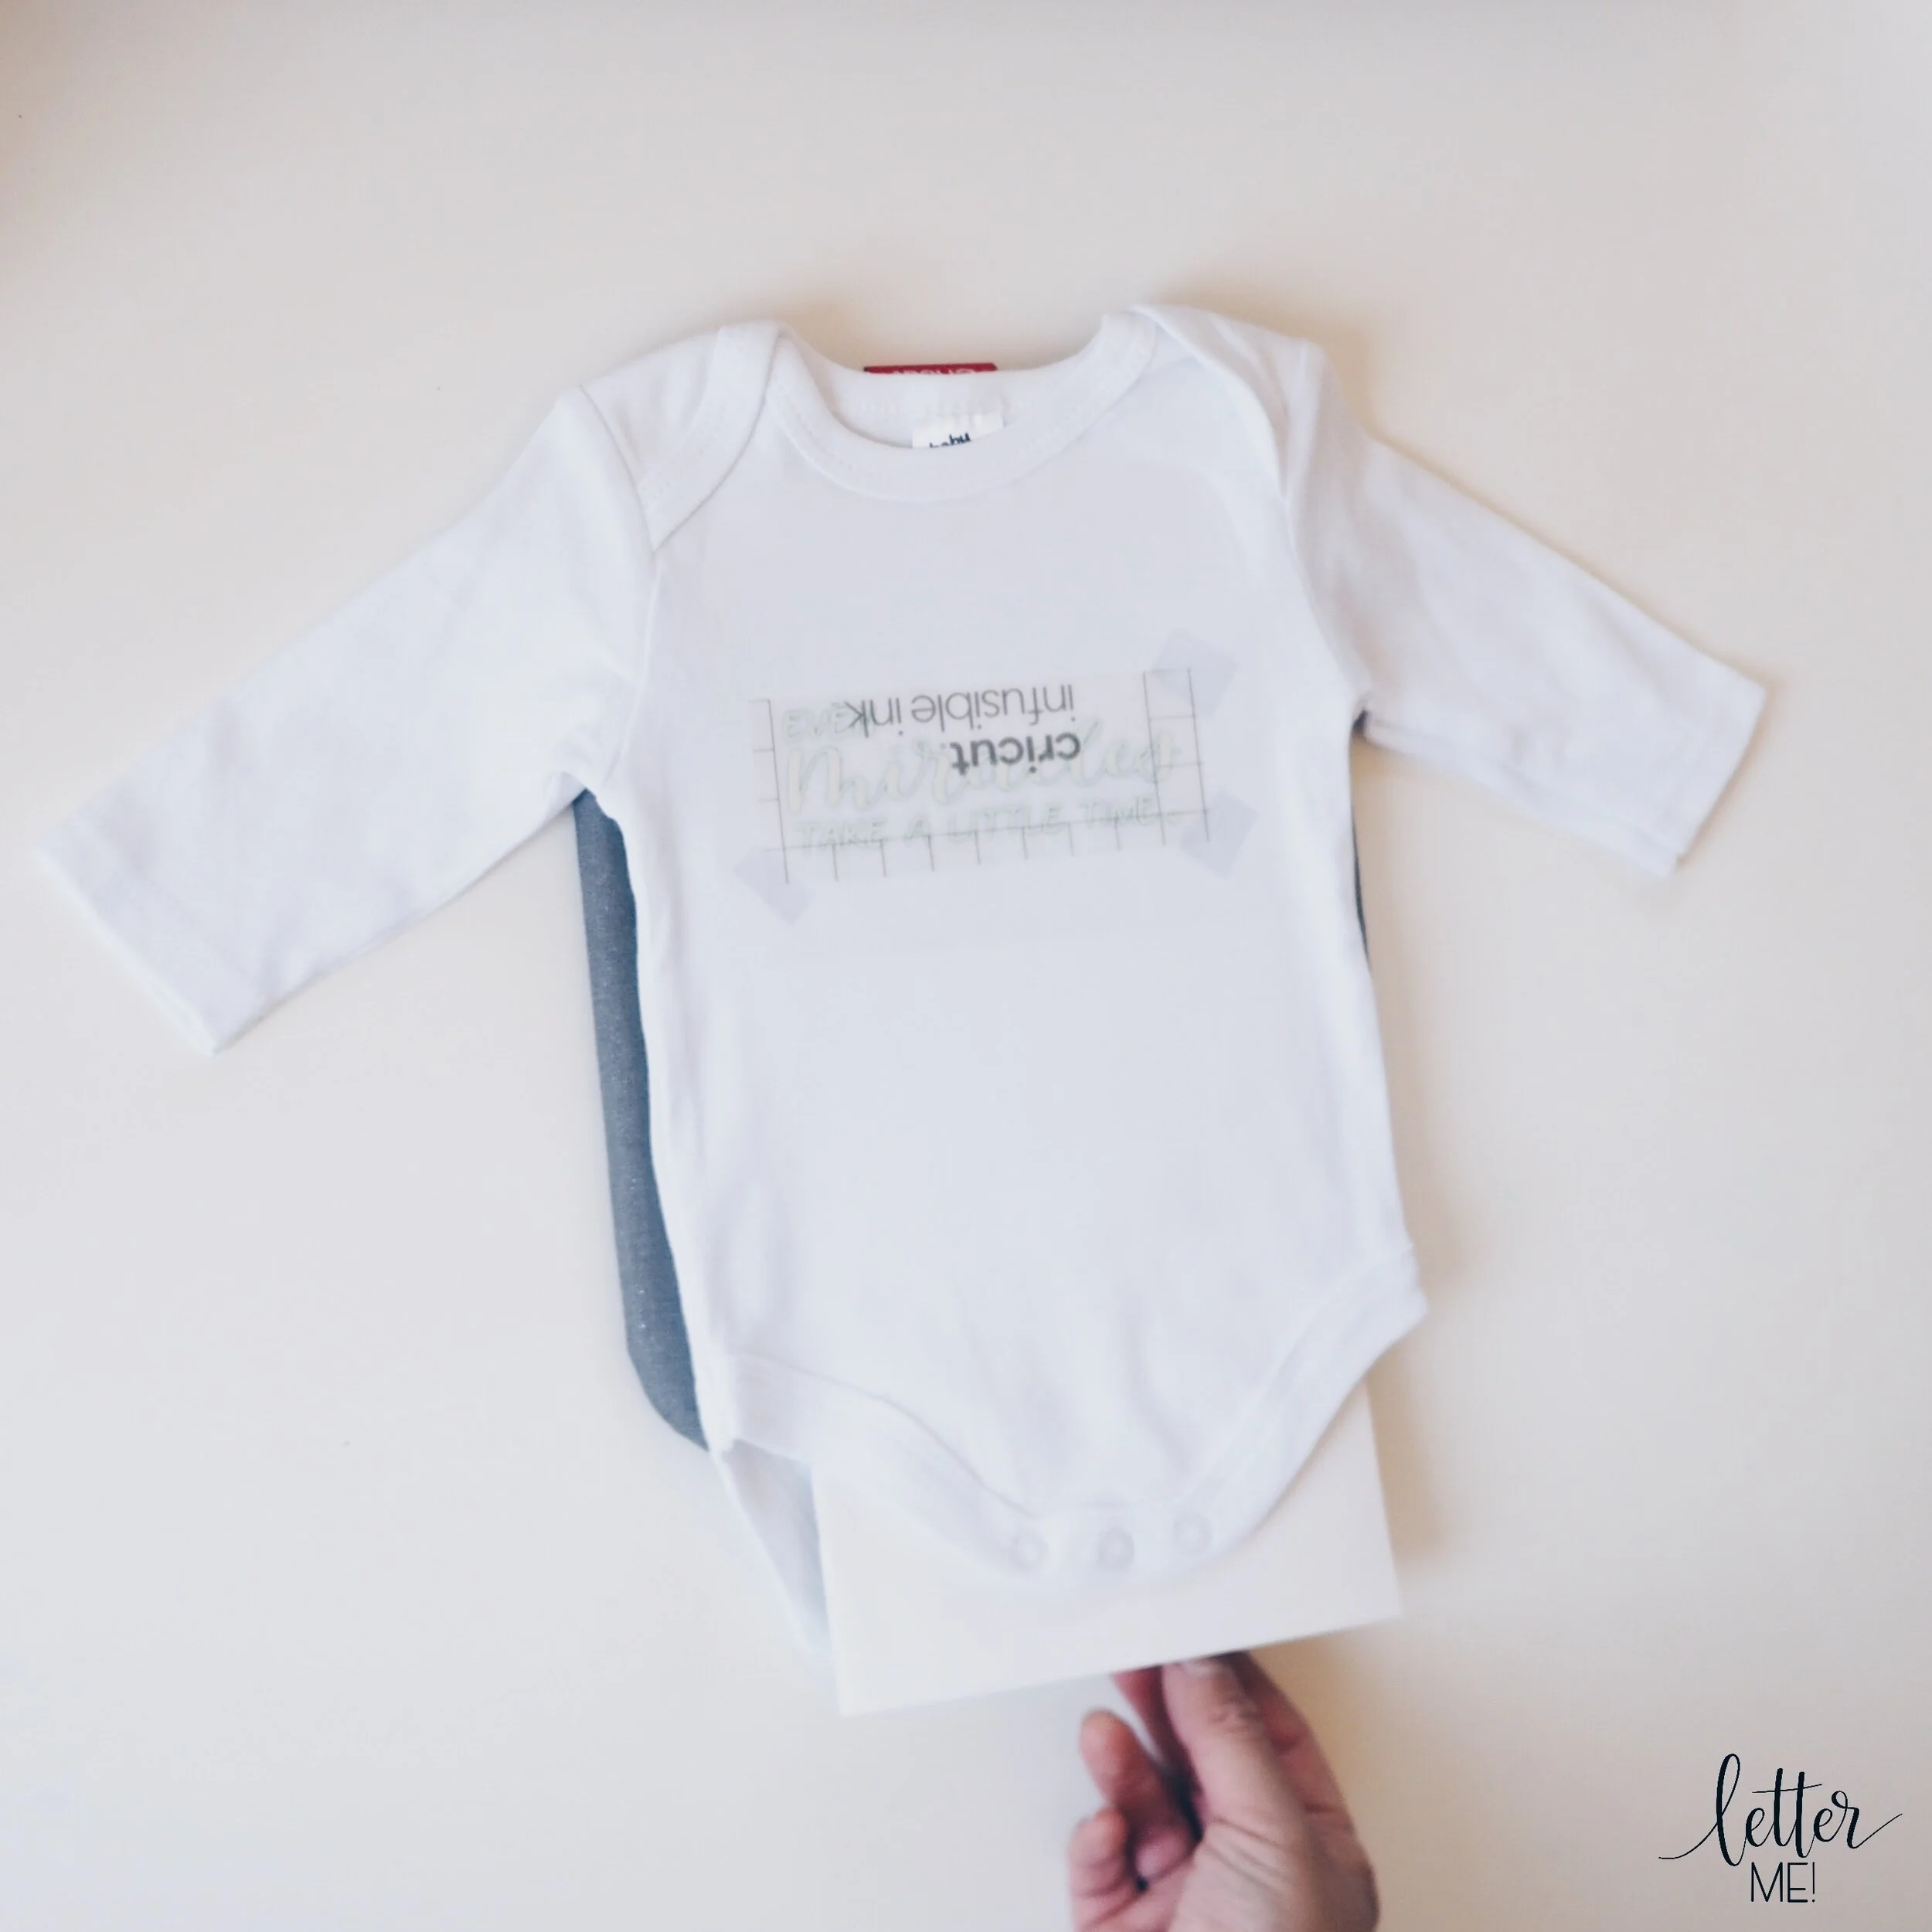
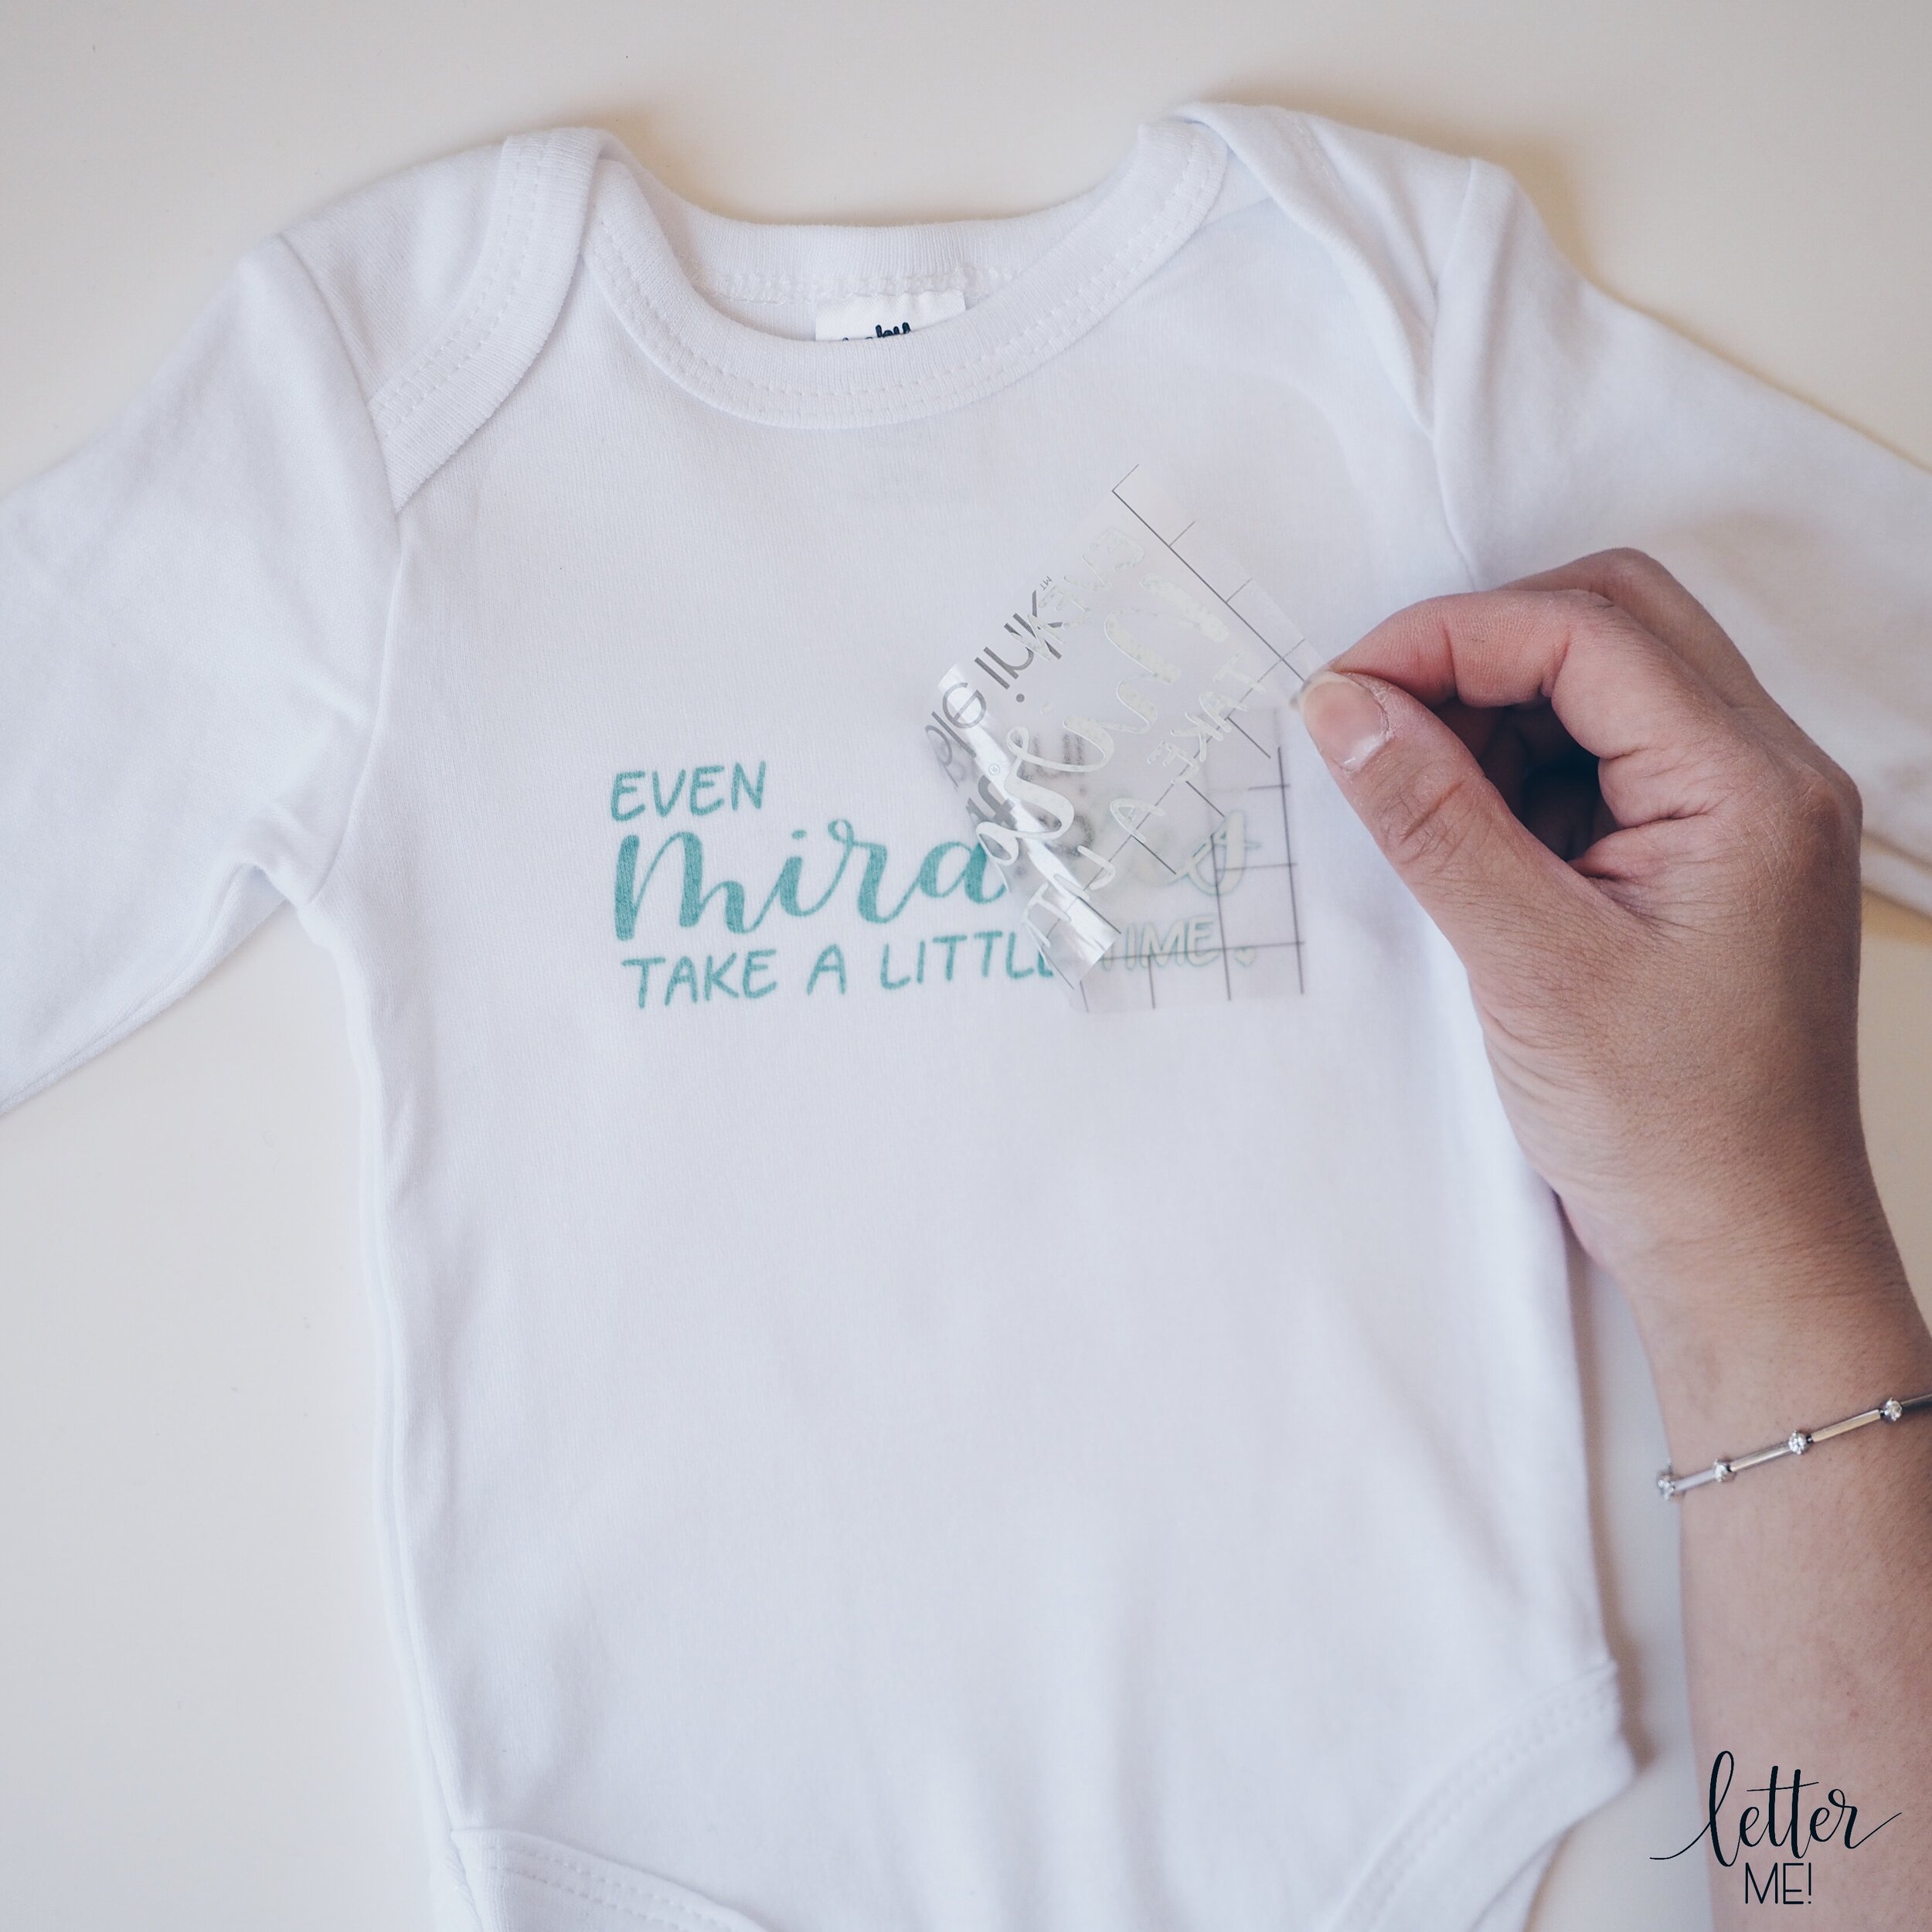
Voila!!!!!! The transfer is complete!!!

54704E0A-5407-4DD3-8BC1-D6C30012AA11.JPG

My first thoughts:

  • First touch: the Infusible Ink Transfer Sheets felt much more thicker than the regular iron-on / HTV; more like rough cardboard on one side, and the shiny, clear transfer backing with gridlines on the other side

  • First experience: instead of using a weeding tool to remove the excess / negative spaces of regular iron-on/HTV, you cant just weed the excess off as the cardboard layers separate. To remove the excess, you need to do the “rolling and cracking” technique, where you gently roll your design to separate the design from the excess. Then you crack the cut and peel off the excess paper. Just like with regular HTV, I can see that it will get easier and quicker with more experience.

  • First visual observation: the colour I chose for my first project seems a bit muted, unlike the vibrant glitters and colours I am used to with the regular Cricut iron-on. However, from the photos and videos I’ve seen of Infusible Ink, I’m sure the other transfer sheets are more vibrant and I had simply selected a more pastel option for this first project.

  • The image (in my case, my calligraphy), seemed to be less “sharp” than what I have been accustomed to with heat transfer vinyl. This would be because the Cricut is capable of cutting the most intricate detail, that would usually sit on top of the fabric. Now that it is infused into the fabric instead of sitting on top, it appears to be more softer.

  • First physical observation: definitely more durable than heat transfer vinyl as the ink is infused into the fabric instead of on top. I could stretch the fabric, rub at it, and not worry that the “iron-on” would crack or peel.

Final words: I can most definitely see great potential with this new technique, especially in the future as new transfers are developed and more materials are made available. Although this is much more durable and is very exciting, I am not concerned that Infusible Ink will make HTV redundant any time soon, as glitter and foil iron-ons are still very desirable, and many applications still work better with heat transfer vinyl applied on top, rather than infused in.

I can’t wait to see what other products Cricut develops for Infusible Ink. I look forward to going on this Infusible Ink journey with you. Next project, I’m going to try the Infusible Ink pens! Can’t wait.

Liz xx.jpg
tags: cricut explore, cricut maker, easypress, cricut easypress, easypress2, cricut EasyPress2, infusible ink, heat transfer, iron on, baby onesie, modern calligraphy, digital lettering, ipad lettering, first impressions, heat press, personalised, personalisation
categories: Craft, Calligraphy, Lettering, Cricut
Thursday 10.24.19
Posted by Liz Tu
Comments: 4
 

Introduction to Cricut

Please note that this post contains affiliate links and I will be compensated if you make a purchase after clicking on my links at NO additional cost to you (I have provided international links for everyone, but for Australian specific stockists, please click on the alternative links in the list below).

EDIT: This post was first created in 2018. Although the instructions and techniques are still relevant, I have since also posted about the Cricut Maker, Cricut Easy Press, as well as Cricut Infusible Ink.

Those who follow me on Instagram and Facebook will know how much I love my new Cricut Explore Air 2 machine and how much I love personalising things with it. I've received literally hundreds of requests to blog about how I do what I do with the Cricut, so here we go.

One of my most popular items in my shop last Christmas were my personalised mugs. So I decided to break it down for you, step-by-step. Although they can be fiddly and the steps may seem overwhelming, these are easily achieved using the Cricut.

Here's what I used (below are links to where you can find these items):

File 23-1-18, 2 43 12 pm.jpeg
  • Apple iPad Pro 12.9" (click here for Amazon Australia)

  • Procreate App

  • Procreate Brushes

  • Apple Pencil (click here for Amazon Australia)

  • Cricut Explore Air 2 ( click here for Amazon Australia and Spotlight eBay)

  • Cricut Gold Adhesive Foil (click here for Amazon Australia and Spotlight eBay)

  • Scissors (click here for Spotlight eBay)

  • Kassa Clear Transfer Tape

  • Cricut Weeding Tool (click here for Spotlight eBay)

  • Cricut Standard Grip Mat (click here for Spotlight eBay and Amazon Australia)

  • Cricut Scraper (click here for Spotlight eBay and Amazon Australia)

  • Cricut Design Space

  • Mug

To make this blog easier to follow, I have broken it up into three sections: DESIGN, CUT and ADHERE.

DESIGN

So before we can cut out our design, we need a design. In this tutorial I will be personalising a mug for "Danny".

IMPORTANT NOTE: For the Cricut to cut out my lettering, it will need to be in a .PNG format. I personally LOVE lettering on the Apple iPad Pro, using the Apple Pencil with the Procreate app. The Apple Pencil is only compatible with the Apple iPad Pro, so it won't work with any other iPad. My custom Procreate Brushes are available here. Procreate is also only available for iOS, so unfortunately for those using other platforms, the first few steps won't be applicable to you. (*Note: I was an avid Windows and Android user until I "needed" Procreate and the Apple Pencil, and now I am an Apple convert).

View fullsize File 23-1-18, 2 43 36 pm.jpeg
View fullsize File 23-1-18, 2 42 45 pm.jpeg
View fullsize File 23-1-18, 2 42 28 pm.jpeg

Step one: Open the Procreate App on your iPad pro and create a new canvas.

Step two: Select your favourite brush/es and create or letter the design you would like on your mug. My custom Procreate Brushes are available here. Try not to make your design too thin or intricate as it may be difficult to cut and adhere later. 

Step three: Go into the layers panel and uncheck the background layer, making it transparent.

Step four: Select Share, and save Image as a .PNG file to your iPad.

CUT

View fullsize File 23-1-18, 3 13 01 pm.jpeg
View fullsize File 23-1-18, 3 12 31 pm.jpeg
View fullsize File 23-1-18, 3 24 06 pm.jpeg

Step one: Turn on your Cricut Explore Air 2 or other Cricut device. Turn the dial on your machine to Custom.

Step two: Open the Cricut Design App on your iPad and Open New Project.

Step three: In your Cricut Design App, Upload your .PNG Image and Select from Camera Roll.

Step four: Insert your image to your new canvas (the checkered background means that it is transparent) and resize the image to your desired size. When you are ready, click on Make It.

View fullsize File 23-1-18, 3 37 37 pm.jpeg
View fullsize File 23-1-18, 3 20 20 pm.jpeg
View fullsize File 23-1-18, 3 36 48 pm.jpeg

Step five: Cut a piece of adhesive foil to the size of your project. Stick it on your mat, coloured side upwards.

Step six: On the Cricut Design App, follow the prompts to set material to Adhesive Foil. I use the original Cricut Adhesive Foil as I find that it sticks well to smooth surfaces. If it's stuck down properly, you can wash the mug forever without the adhesive ever peeling off, and that's what you want. 

Step seven: Next, follow the prompts to load the mat. And finally, CUT!

ADHERE

View fullsize File 23-1-18, 3 47 43 pm.jpeg
View fullsize File 23-1-18, 3 48 42 pm.jpeg
View fullsize File 23-1-18, 3 49 20 pm.jpeg

Step one: After the Cricut Design App tells you that cutting is complete, unload your mat.

Step two: Carefully peel your adhesive off the mat, and then peel off the excess foil and negative space (the transparent part of the design).

Step three: Using a Cricut weeding tool, carefully lift off the negative space in between the letters and in the centre parts of the letters such as a, g, d, e and o.  Once you're done, your adhesive should look exactly how you'd like it to look on your mug.

Step four: Next, cut a piece of transfer paper/tape, the size of your adhesive foil design. I use Kassa Clear Transfer paper/tape (Use coupon code "LETTERME" to get 20% off your Kassa products) as I find that it works best with foil adhesive. To make alignment even easier for you later, the Kassa Clear Transfer Paper comes with blue gridlines. You can use the guidelines to cut your transfer paper to size (the lines are exactly 1 inch apart) and I love lining my work up to the gridlines to help keep my work straight. 

View fullsize File 23-1-18, 4 04 36 pm.jpeg
View fullsize File 23-1-18, 4 04 16 pm.jpeg
View fullsize File 23-1-18, 4 03 58 pm.jpeg

Step five: Stick your Kassa Clear Transfer Paper over your foil design. Using the Cricut Scraper tool, go over the design to make sure that the transfer paper is properly adhered to the foil.

Step six: Slowly and carefully, remove the backing paper of the foil adhesive off the transfer paper. Be careful as to not touch the adhesive surface of the foil as the oils from your hands will effect the adhesiveness and longevity of your adhesives.

Step seven: Making sure your mug is clean, carefully line up the transfer tape with your foil design on to your mug. Using the Cricut scraper again, scrape down every part of the foil adhesive on to the mug, ensuring that all bubbles are removed.

Step eight:  Carefully remove the Kassa transfer tape off your mug. Voila, your mug is complete!!  

View fullsize File 23-1-18, 4 03 33 pm.jpeg
View fullsize File 23-1-18, 4 07 26 pm.jpeg


*Please note that Adhesive Foil is not recommended for dishwashers, and of course, do not ever put foil in the microwave!

Hope you've enjoyed reading this blog!  Please "like" the blog and leave me a message!!  

View fullsize Liz xx.jpg

CHECK OUT MY NEW BLOGS: Hello Cricut Maker!, Cricut Easy Press 2 and Cricut Infusible Ink.

tags: diy, kassa, transfer tape, cricut, cricut explore air 2, explore air, explore air 2, cricut explore, die cut machine, personalisation, procreate, ipad, ipad pro, apple pencil, apple, mug, personalised mug, personalised gift, adhesive foil, foil, vinyl, foil vinyl, adhesive vinyl, custom, custom design, custom made, craft, craft blog, crafting
categories: Calligraphy, Craft, kids, Lettering
Tuesday 01.23.18
Posted by Liz Tu
Comments: 72
 

Emboss like a boss!

All you need to know about embossing on objects such as cannisters. Materials and tools are listed at the bottom of the blog.

I decided to write this blog after my videos went viral on Instagram and although I try to reply to each and every message, it has been increasingly difficult to address each question with a lengthy and thorough response.  

Read more

tags: embossing, emboss, hand lettering, faux calligraphy, personalisation, diy
categories: Lettering, Calligraphy, Craft
Wednesday 07.19.17
Posted by Liz Tu
Comments: 131
 

Copyright © 2025, Letter Me!, All rights reserved.